
Installing A Moen kitchen faucet is A great way to update and improve your kitchen. It may seem daunting at first, But with the right tools and instructions, Anyone can install A Moen kitchen mill in no time. In this article, We will provide step-by-step instructions to help you install your new Moen cookhouse mill quickly and efficiently. We will also provide tips for troubleshooting any problems that might arise during the installation process. How To Install Moen Kitchen Faucet
Turn off The Water Supply

Turning off the water supply is an important step that you must take before installing Or replacing your kitchen faucet. It not only ensures your safety but also makes the installation process easier and smoother.
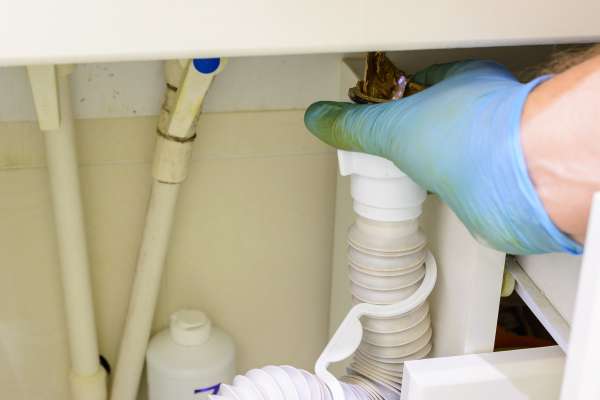
To turn off the water supply, Locate the shut-off valves under your sink. These valves may be located at either side of the sink Or on top of the wall behind it. Once you have found them, Turn them clockwise to shut off the water flow to your kitchen mill. Make sure that both hot and cold-water supplies are turned off before proceeding with any further steps.
After turning off the water supply, You can now proceed with installing your new Moen cookhouse mill. Follow all instructions provided in its manual carefully and make sure everything is tightened properly.
Remove Any Old Faucet
The first step is to turn off the water supply by closing the valves under the sink. Then, Disconnect any water lines and remove any nuts Or screws that are holding the faucet in place. Once the old mill is removed, Clean up any debris or residue left behind.
Now that you’ve successfully removed your old mill, It’s time to install your new Moen cookhouse faucet! Start by reading through the manufacturer’s instructions carefully and gathering all necessary tools. Install any mounting hardware that came with your new mill before attaching any hoses Or lines.
Next, Attach all necessary hoses and fittings according to manufacturer instructions; This usually involves using Teflon tape on threaded connections to prevent leaks. Finally, Turn on your water supply and test for leaks.
Clean The Sink Area

One of the most important aspects of this area is the mill, Which should be installed properly to avoid any leaks Or malfunctions. If you’re looking to upgrade your current mill, Consider the Moen Kitchen Faucet, Known for its durability and sleek design.
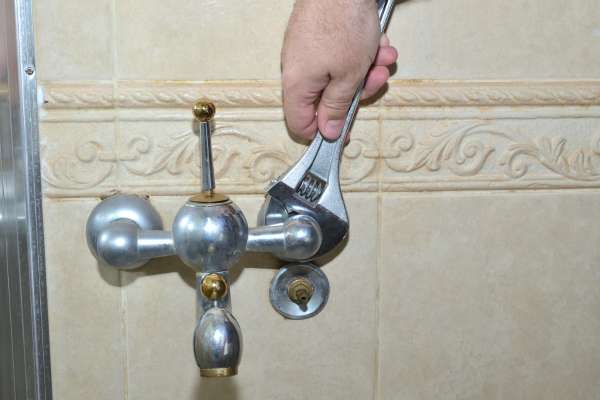
To install A Moen cookhouse Faucet, Start by turning off the water supply valves under your sink. Then, Remove your old mill by loosening the nuts holding it in place with A wrench. Once removed, Clean any debris Or residue from the sink surface and make sure there are no leaks in the plumbing connections before installing your new mill.
The Moen cookhouse mill comes with easy-to-follow instructions and all necessary hardware for installation.
Insert The Gasket And Mounting Plate Into The Sink
One of the essential steps in this process is inserting the gasket and mounting plate into the sink. This step is crucial as it ensures that your faucet is securely attached to the sink, Preventing any leaks Or wobbling.
Start by placing the gasket onto the sink’s surface where you intend to install your mill. The gasket acts as A sealant that prevents any water from seeping through to other areas beneath your sink. After placing it correctly, take your mounting plate and slide it over the threads of your faucet until it rests on top of the gasket.
Tighten down each screw on either side of your mounting plate using A screwdriver Or wrench.
Attach The Faucet Base To The Mounting Plate
This process can be tricky at first, But with A little patience and some careful attention to detail, You’ll have your faucet up and running in no time.
First, Make sure that you have all the necessary tools on hand – This will typically include A wrench, Pliers, And A screwdriver. Next, Position the mounting plate in place where you want your mill to go. Hold it steady while inserting screws into each of the holes around its perimeter. Tighten these screws until they are secure.
Once your mounting plate is securely in place, It’s time to attach the faucet base itself. Align it with the holes in the mounting plate and then insert any necessary screws Or bolts through both pieces before tightening them down firmly.
Secure The Mounting Nuts Using An Adjustable Wrench
One crucial step in the installation process is securing the mounting nuts using an adjustable wrench. This will ensure that your new faucet is securely attached to your sink and prevent leaks Or other issues.
To begin, Make sure you have all of the necessary tools on hand, Including an adjustable wrench. Before installing your new Moen cookhouse mill, be sure to read through the manufacturer’s instructions carefully to ensure proper installation. Once you are ready to install your new mill, Start by placing the rubber gasket over the sink holes and inserting the mounting bolts from underneath.
Next, Use an adjustable wrench to tighten each mounting nut until they are snug against the bottom of the sink. Be careful not to overtighten as this could cause damage to your sink Or faucet.
Install Handle And Spout
One of the most important elements of installing the faucet is ensuring that the handle and spout are securely attached to the base. By following these steps, You can ensure that your new Moen kitchen mill functions properly for years to come.
The first step in installing your Moen cookhouse mill is to remove the old fixture. Once this has been done, You can proceed with attaching the base of your new mill to your sink Or countertop using either screws or clips. Next, Attach the spout assembly by firmly screwing it into place on top of the base unit, Making sure everything is straight and aligned correctly.
Now it’s time to install the handle assembly.
Connect The Water Supply Lines To The Faucet
One of the essential steps in installing your new Moen kitchen faucet is connecting the water supply lines to the faucet.
Before you begin, Ensure that you have all the necessary tools and materials on hand. You will need adjustable pliers, Teflon tape, A bucket Or container to catch any excess water, And of course, Your Moen cookhouse mill. Once you have everything ready, Turn off both hot and cold water supply valves under the sink by turning them clockwise until they stop.
Next, Connect one end of each supply line to its respective valve by tightening it with adjustable pliers. Remember to wrap Teflon tape around each threaded end before connecting them to prevent leaks.
Tighten The Connections With Pliers
A Moen Kitchen Faucet can be a great addition to your home, But if you don’t tighten the connections properly, It could lead to leaks and other issues down the line.
To start off, Make sure you have all of the necessary tools before beginning installation. You will need adjustable pliers, Basin wrenches, Teflon tape and A bucket Or plastic container. Once you have everything set up, Turn off your water supply and remove any old fixtures Or debris from your sink.
Next, Carefully follow the manufacturer’s instructions for installing your new Moen cookhouse Faucet. Be sure to attach all necessary parts and secure them tightly with pliers as needed. Use Teflon tape around threads for additional sealing protection against leaks.
Turn On The Water Supply Valves

This will ensure that there is no pressure built up in the pipes and that the installation process goes smoothly. Before beginning any plumbing project, It is essential to make sure that your water lines are turned off.
To turn on your water supply valves, Locate them under your sink. One valve controls hot water while the other controls cold water. Turn both valves clockwise until they are fully closed. Then, Slowly turn them counterclockwise until they are fully open. This will allow water to flow freely through your pipes and prepare them for the installation of your new mill.
Once you have turned on your water supply valves, You can begin installing your Moen kitchen faucet according to the manufacturer’s instructions.
Check For Any Leaks

Even the slightest leak can cause damage to your cabinets or countertops over time. Follow these steps to ensure that your new faucet is properly installed And leak-free.
First, Turn off the water supply valves under your sink. This will prevent any water from flowing while you’re working on the mill installation. Next, Attach the sprayer hose and mounting hardware according to the manufacturer’s instructions. Be sure to tighten all connections with A wrench Or pliers.
Once everything is connected, Turn on the water supply valves and slowly open the mill handle to test for leaks. Check around all connections, Including where the sprayer hose attaches and where the spout meets the base of the faucet. If you notice any drips Or leaks, tighten those connections until they’re completely secure.
Check The Faucet For Proper Water Flow
One thing that you need to ensure is proper water flow. Proper water flow not only ensures that you have enough water supply but also saves you from high water bills. If the mill is not installed properly, Then it may lead to low pressure Or even leakage which can cause damage to your property.
To check the water flow of your Moen cookhouse faucet, start by turning off all the other faucets in your home. Then turn on the kitchen sink and let it run for about 30 seconds. After this time period has passed, Place A measuring cup under the mill and collect the amount of water flowing out for another 30 seconds. If you collected less than eight ounces of water during this period, Then there may be an issue with your mill installation.
Install The Sprayer Hose

One of the most important steps in installing A Moen kitchen faucet is to properly install the sprayer hose. The sprayer hose allows you to easily rinse dishes and clean the sink, So it’s important to take your time during this step.
To install the sprayer hose, First, Locate the end of the hose that connects to the mill. This will be on the underside of the mill near where you attached it to your sink. Next, Insert one end of A plastic washer into each end of the hose connector and then attach it to your mill by twisting it clockwise until it is snug.
Be sure not to overtighten as this could damage Or break your new mill.
Clean up Any Excess Putty or Debris
It’s important to clean up any excess putty Or debris that may have accumulated during the process. This will not only help ensure that your new faucet looks its best, But it will also help prevent any potential plumbing issues down the road.
One of the first steps in cleaning up excess putty or debris is to remove any visible material from around the base of the mill. You can use a putty knife Or other flat tool to carefully scrape away any remaining residue. It’s important to be gentle during this process so as not to scratch or damage your new fixture.
After removing any visible material, You’ll want to wipe down the area with A damp cloth Or sponge. This will help remove any remaining residue and ensure that there are no loose pieces left behind.
Dispose Of Any Old Faucet Or Packaging Materials
This not only ensures that you have A clean workspace to install your new mill, But also helps with environmental responsibility.
To begin the installation process for your new Moen cookhouse Faucet, Make sure to remove your old faucet first. This can be done by turning off the water supply valves under the sink and using A wrench to loosen the nuts holding the mill in place. Once removed, Dispose of the old mill at A local recycling center Or take it to A hazardous waste disposal site if necessary.
In addition to disposing of your old faucet, It’s also important to recycle any packaging materials that came with your new Moen cookhouse mill. Cardboard boxes and plastic wrapping can all be recycled at most local recycling centers.
The Final Thought
Installing A Moen kitchen faucet is A great way to upgrade your kitchen without spending a lot of money. Not only does it add an attractive touch, But you can also count on it being reliable and durable for many years. The process is straightforward and easy to follow and most people can complete the installation in less than an hour. Taking the time to read up on the instructions ahead of time will help make the entire process easier and reduce the amount of time spent working on it.