
Removing a Moen kitchen tap is not as difficult as it seems. With the right tools And a bit of patience, You can have your old faucet taken out And replaced with a brand-new one in no time. Luckily, With the right tools and instructions, It is possible to remove a Moen kitchen faucet in order to replace or repair it. This article will provide step-by-step instructions on how to remove a Moen kitchen faucet quickly And effectively. It will also discuss some of the common issues associated with removing a Moen cookhouse tap as well as how to avoid them.
Turn off The Water Supply
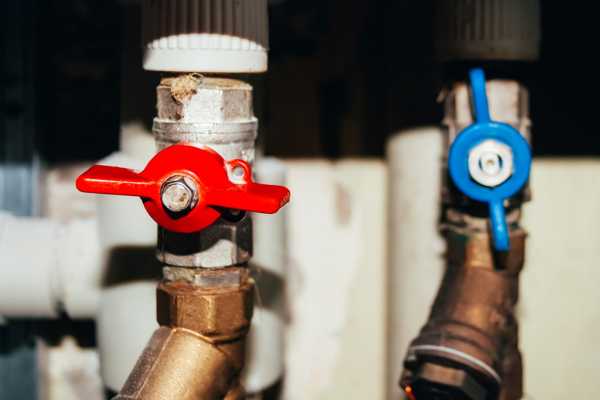
Moen kitchen faucets are known for their durability and functionality. However, over time, Even the best faucets can develop leaks Or become difficult to operate. If you notice your Moen cookhouse tap is leaking Or not working correctly, The first thing you should do is turn off the water supply.
Turning off the water supply is an essential step in removing a Moen cookhouse tap. To do this, Locate the shut-off valve under your sink And turn it clockwise until it stops. This will prevent any water from flowing through the pipes And ensure that you don’t have any accidents while removing the tap.
Once you’ve turned off the water supply, You can start removing your Moen cookhouse tap. Begin by disconnecting any hoses Or lines attached to your tap using pliers Or a wrench if necessary.
Shut Off The Valves Under The Sink
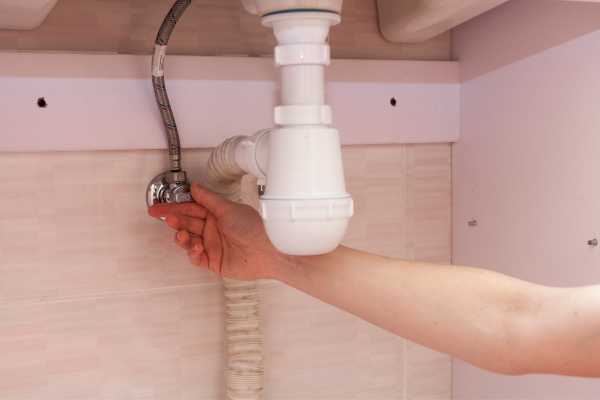
Shut off the valves under the sink before cleaning your kitchen tap head. This is a crucial step to ensure that no water will flow from the faucet while you are cleaning it. Shutting off the valves will also prevent water from getting into your eyes or making a mess on your countertop.
Cleaning your kitchen faucet head is an essential task that should be done regularly to maintain hygiene and functionality. Over time, mineral deposits and dirt can accumulate in the faucet head, which can affect its performance and cause bacteria growth. Therefore, it’s important to clean it periodically to prevent these issues.
To clean your kitchen tap head, start by unscrewing it from the spout using pliers or an adjustable wrench. Soak it in white vinegar for about 30 minutes to dissolve any mineral deposits, then rinse with warm water and dry thoroughly with a soft cloth.
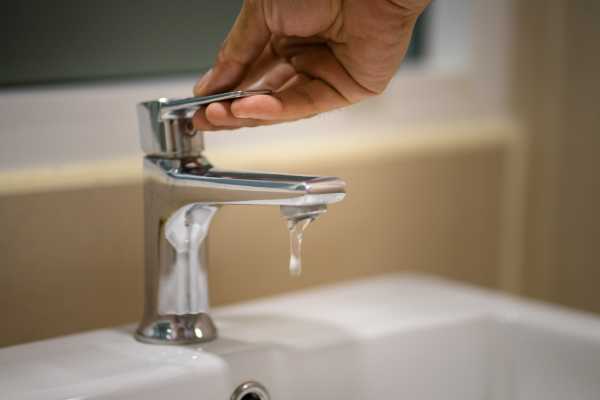
Turn on The Faucet to Release Any Remaining Water
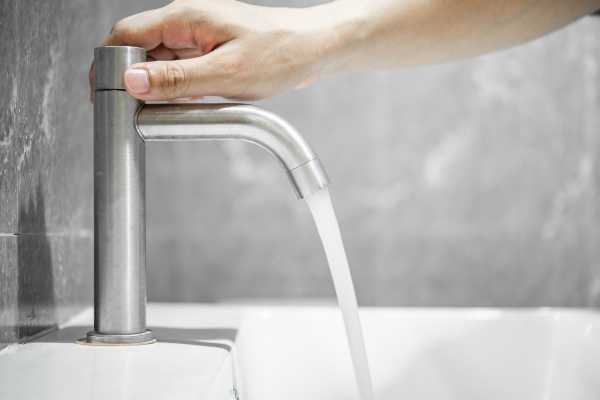
Removing a Moen cookhouse tap can seem like an intimidating task, But with the right tools and approach, It can be done successfully. One of the final steps in this process involves turning on the tap to release any remaining water. This may seem like a small detail, but it’s important to ensure that you don’t end up with a flood in your kitchen.
To turn on the faucet, first, make sure that all of the water supply valves are turn off. This will prevent any additional water from flowing into your sink or onto your floor. Next, turn on the hot and cold handles of your Moen cookhouse tap to let any remaining water flow out. You may need to use some pliers or an adjustable wrench to loosen any connections if there is still some resistance.
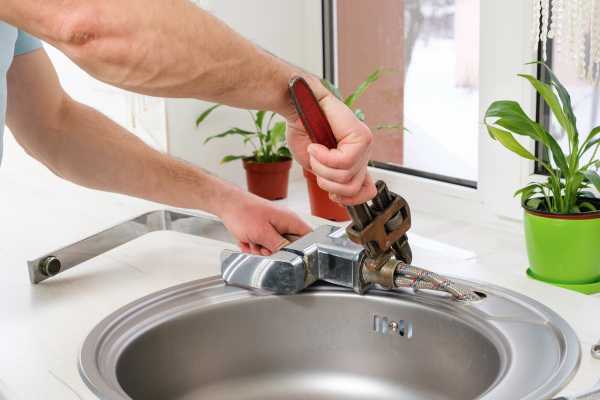
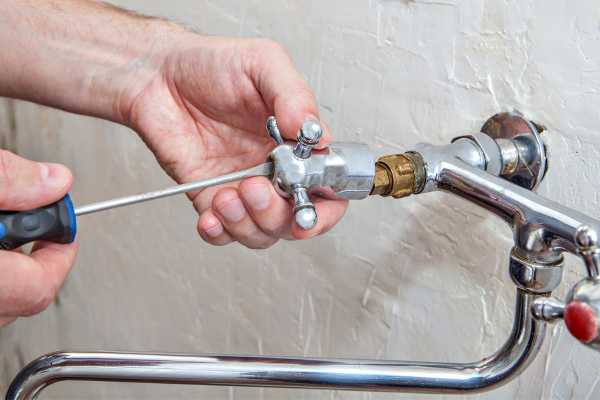
Use The Basin Wrench to Loosen The Nuts

Removing a Moen kitchen tap can be intimidating, but with the right tools and knowledge, it’s a task you can easily complete. One of the most important tools you’ll need is a basin wrench. This unique wrench features an adjustable head that allows you to access hard-to-reach nuts beneath your sink. With this tool in hand, you can loosen and remove the nuts holding your Moen kitchen faucet in place.
To begin removing your Moen cookhouse tap, start by turning off the water supply valves beneath your sink. This will prevent any accidental spraying or leaking while you work. Next, disconnect any hoses or lines attached to your faucet and use a towel to dry up any remaining water around the area. Once everything is dry, use your basin wrench to loosen each nut holding the tap in place. Be sure to turn them counterclockwise until they’re completely loose.
Use The Adjustable Wrench to Remove The Nuts Completely
Removing a Moen kitchen tap can be a tricky task, Especially if you don’t have the right tools for the job. One essential tool to have in your toolbox is an adjustable wrench. This versatile tool enables you to adjust its opening size, Making it ideal for removing nuts of different sizes.
Before starting, Turn off the water supply And unscrew any screws that may hold the faucet in place. Next, Use the adjustable wrench to grip the nut on the bottom side of the sink And turn it counterclockwise until it’s loose enough to remove by hand. If you encounter a stubborn nut that won’t budge, Apply some penetrating oil And let it sit for several minutes before trying again.
Once all nuts are removed completely, Gently lift up on your Moen cookhouse tap until it comes free from its mounting holes.
Remove The Water Lines From The Faucet
Removing the water lines from your Moen cookhouse tap may seem like a daunting task, But with the right tools And guidance, It’s actually quite simple. Whether you’re replacing your old faucet Or just need to remove it for cleaning purposes, We’ve got you covered.
Firstly, Turn off the water supply to your kitchen sink. You’ll usually find this located under the sink. Next, Disconnect the hot And cold water supply lines from the tap using an adjustable wrench Or pliers. Make sure to have a bucket nearby to catch any excess water that may spill out.
Once you’ve disconnected the water lines, Use a basin wrench to loosen And remove the mounting nuts holding your Moen kitchen faucet in place. Carefully lift out the old faucet And clean any remaining debris Or buildup around its mounting area.
Use The Screwdriver to Remove Any Screws Holding
Removing a Moen cookhouse tap may seem like an intimidating task, But with the right tools and steps, It can be done quickly And easily. One crucial tool you will need is a screwdriver. Before you begin disassembling your faucet, It’s essential to turn off the water supply to avoid any potential leaks.
Once you have turned off the water supply, Use the screwdriver to remove any screws holding the faucet in place. Depending on the model of the tap, There may be one Or multiple screws to remove. Once you have removed all screws, Gently lift the old faucet out of its position.
After removing your old faucet, Clean any remaining debris Or residue from around the installation area with a cloth Or brush. Next, Install your new Moen cookhouse valve according to manufacturer instructions And secure it in place using screws And other hardware provided.
Remove Any Clips or Brackets Securing The Faucet to The Sink
Removing a Moen kitchen tap is not rocket science, but it can be challenging if you don’t know the right steps. One of the essential things to do when removing a Moen kitchen faucet is to remove any clips or brackets securing the fixture to the sink. These small pieces of hardware hold the faucet securely in place and prevent it from wobbling or coming loose.
To remove any clips or brackets securing your Moen kitchen faucet, you’ll need a few tools such as pliers, wrenches, and screwdrivers. Before starting, ensure that you shut off the water supply valves under your sink and disconnect them from your faucet’s water lines. Once this is done, look for any mounting screws on top of or underneath the sink that may be holding the clips or brackets in place. Use a screwdriver to unscrew these screws carefully and put them aside for safekeeping.
Carefully Lift The Faucet Off The Sink

Removing a Moen kitchen tap can seem like a daunting task, but with the right tools and techniques, it can be done with ease. One of the first steps in removing your Moen cookhouse valve is to carefully lift the faucet off the sink. This may sound simple enough, but it is important to take precautions to avoid damaging your sink or causing injury.
Before removing your Moen kitchen valve, ensure that you have turned off the water supply valves under the sink. Then, use an adjustable wrench to loosen and remove any mounting nuts or screws that are holding the tap in place. Once you have removed these fasteners, gently lift the tap up and away from the sink.
It is important to note that some faucets may require additional steps or tools for removal. Be sure to consult your manufacturer’s instructions before attempting any repair or installation work on your Moen cookhouse valve.
Use a Clean Cloth to Wipe Down The Surface

Knowing how to remove a Moen kitchen faucet can save you time and money. It’s a handy DIY skill that every homeowner should learn. However, before you start disassembling your faucet, there are some important things you need to consider. One of which is the importance of cleaning the surface with a clean cloth.
Before removing any part of your Moen cookhouse valve, make sure that the area is free from dirt and debris. Use a soft cloth or rag to wipe down the surface where the faucet is attached to prevent any scratches or damage. This will also help you identify any leaks or issues with your faucet more easily.
A clean cloth can be a simple yet effective tool in maintaining your Moen kitchen faucet’s cleanliness and functionality. By wiping down all surfaces before removal, you ensure that no debris falls into open spaces during disassembly, which could cause further problems later on.
Apply Plumber’s Tape to The Threaded Connections on The Sink
Removing a Moen cookhouse valve may seem like a daunting task, but with the right tools and knowledge, it’s actually quite simple. One important step in the process is applying the plumber’s tape to the threaded connections on the sink. This will help create a watertight seal when you reinstall your new faucet.
To apply the plumber’s tape, start by cleaning the threads on both the faucet and sink with a rag or cloth. This will ensure that there is no dirt or debris that could interfere with the tape adhering properly. Next, take your roll of plumber’s tape and wrap it clockwise around each threaded connection 2-3 times, making sure to overlap slightly as you go.
It’s important not to overdo it with the plumber’s tape – using too much can actually cause leaks rather than prevent them.
The Final Thought
Removing a Moen cookhouse valve requires some knowledge and preparation but is not difficult. With the right tools, you can easily take off the old faucet and install a new one. Be sure to turn off the water supply before beginning any work. If you’re feeling overwhelmed, contact a professional for help. Doing so will ensure that your faucet is replaced or removed in a safe and efficient manner.