
Removing A Moen kitchen faucet handle can seem like A daunting task, But it does not have to be. With the proper tools and know-how, You can easily take off the cookhouse faucet arm in no time. This article will provide step-by-step instructions on how to successfully remove Moen cookhouse mill arm. How To Remove Moen Kitchen Faucet Handle
Importance Of Removing Moen Kitchen Faucet Handle
The Moen cookhouse faucet handle is A crucial component that allows you to control the water flow in your sink. It is an essential part of your kitchen, But there may come A time when you need to remove it. This could be due to wear and tear, Leaks Or damage. Whatever the reason, It is important that you know how to remove the cookhouse faucet arm.
Removing the Moen cookhouse mill handle might seem like A daunting task, But it is actually quite simple. The first step is to turn off the aqua supply valves under the sink. Once this has been done, You can start removing the arm by unscrewing any screws Or nuts holding it in place. Next, Use pliers Or an adjustable wrench to loosen and remove any remaining components.
How Do I Know if I Need to Replace My Moen Kitchen Faucet Handle
Moen cook room faucets are well-known for their durability and longevity. However, Even the best products have A lifespan, And eventually, They may need replacement. One of the most common problems that homeowners encounter with Moen cookhouse mill is A broken Or worn-out handle. A faulty arm can be frustrating to deal with As it makes it difficult to control water flow.
If you’re experiencing difficulties turning your Moen cookhouse faucet on Or off, It may be time to replace the arm. The first step in replacing your cookhouse mill handle is to remove the old one. This process requires some basic tools such as pliers, screwdrivers Or an Allen wrench depending on the type of mill you own. Once you have these tools ready, Turn off your aqua supply and take off any decorative coverings from around the base of your faucet.
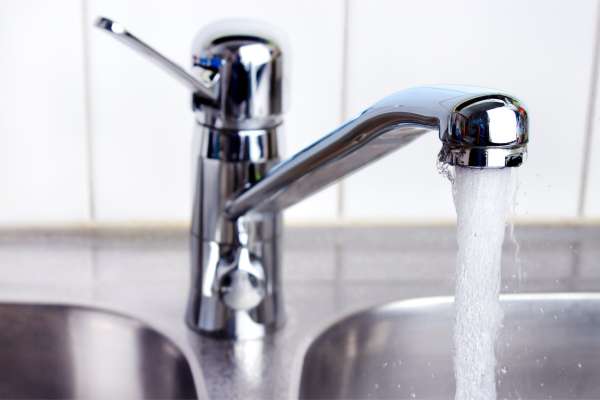
Turn Off the Water Supply To The Faucet
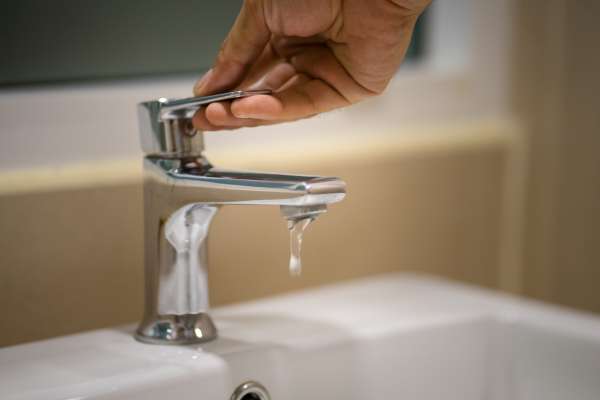
One of the most common problems that homeowners encounter with Moen cook room faucets is A broken Or worn-out handle. A faulty arm can be frustrating to deal with As it makes it difficult to control water flow.
If you’re experiencing difficulties turning your Moen cookhouse faucet on Or off, It may be time to replace the arm. The first step in replacing your cookhouse mill handle is to remove the old one. This process requires some basic tools such as pliers, Screwdrivers Or an Allen wrench depending on the type of mill you own. Once you have these tools ready, Turn off your aqua supply and take off any decorative coverings from around the base of your mill.
Close The Sink Drain Stopper
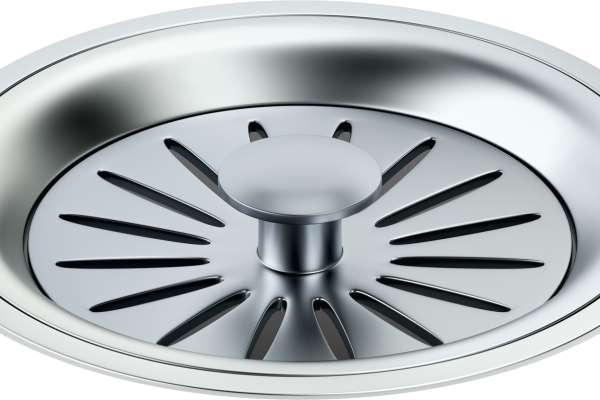
Closing the sink drain stopper may seem like A small and insignificant task, But it can actually make A big difference in the functionality of your cookhouse faucet. When the drain stopper is left open, Debris and food particles can easily clog up your pipes and cause water to back up in your sink. This not only leads to unpleasant odors, But also creates An unsanitary environment that can be difficult to clean.
If you’re having trouble removing the Moen cookhouse mill arm to access the sink drain stopper, Don’t worry. With A few simple tools and some patience, You can easily remove the handle and get your sink draining properly again. Start by turning off the aqua supply valves under your sink to prevent any accidental leaks or flooding. Then, Use an Allen wrench Or screwdriver (depending on your specific model) to remove the set screw holding the handle in place.
Identify The Type Of Moen Kitchen Faucet Handle

Identifying the type of Moen cook room faucet handle can be quite challenging for some people, Especially if you are not familiar with the brand Or its products.
One way to identify the type of cookhouse mill arm is by looking at the shape and design. Different models have unique arm that vary in size, Shape, And style. You can also check your owner’s manual Or search online for information about your specific model.
If you need to remove your Moen cookhouse mill arm, There are different methods depending on the type of handle you have. The most common types include levers, Knobs, And buttons that control both temperature and water flow.
Gather The Necessary Tools
Find A pair of pliers and an adjustable wrench, Both of which will be necessary for removing the retaining clip that secures the faucet handle in place. You’ll also need A screwdriver to remove any screws holding the arm in place.
Before beginning with any plumbing work, Always make sure to turn off the water supply to avoid any leaks Or damage. Once you’ve turned off the aqua supply, It’s time to begin removing the Moen cookhouse mill arm. Start by loosening And removing any screws that are holding the handle onto your sink’s base plate Or countertop.
In some cases, Faucets may require additional specialized tools for removal; However, Most kitchen mill can be removed with standard household tools.
Access The Set Screw
The process may seem daunting, But with the right tools and techniques, It can be done in A few simple steps. Here are some tips on how to access the set screw for your Moen cookhouse faucet handle.
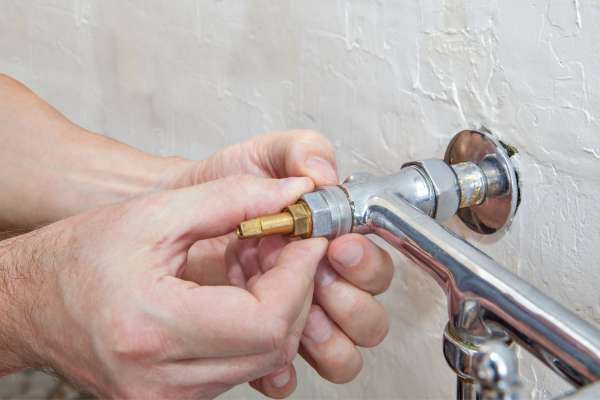
Firstly, Turn off the water supply valves under your sink to prevent any leaks Or water damage during the process. Next, Remove the decorative cap from your faucet arm by either prying it off with A flathead screwdriver Or unscrewing it using pliers. Once you have removed the cap, You should see A small opening where you can access the set screw.
Using an Allen wrench that fits into this opening, Turn it counterclockwise until it loosens enough to remove from the mill handle.
Loosen The Set Screw Using An Allen wrench
Removing A Moen kitchen faucet arm can be challenging, Especially if you are not familiar with the process. One of the most crucial steps is loosening the set screw that holds the handle in place. Fortunately, You do not need any specialized tools to accomplish this task. All you need is an Allen wrench and A little bit of patience.
The first step in removing your cookhouse faucet arm is to turn off the aqua supply under the sink. This ensures that there will be no water flowing through your faucet during the removal process. Next, Locate the set screw on your mill handle, which should be located near where it attaches to the base of your mill. Use an appropriately sized Allen wrench to loosen this screw by turning it counterclockwise until it comes free.
Remove The Set Screw
Removing the set screw from A Moen cook room faucet handle might seem like A daunting task, But it’s actually quite simple. With the right tools and some basic knowledge, You can easily remove your mill arm in no time.
First, Turn off the aqua supply to your mill by shutting off the valves under your sink. Next, Use an Allen wrench to loosen the set screw located on the underside of your cookhouse faucet arm. Once you have loosened the screw, Gently wiggle And twist the handle until it comes loose. If you encounter any resistance Or difficulty in removing your arm, Try using A hair dryer to heat up any stuck-on adhesive Or corrosion that may be preventing it from coming off.
Once you have successfully removed your Moen cookhouse mill handle, Inspect it for any signs of damage Or wear and tear.
Lift Off The Handle
Whether you’re replacing the handle Or fixing A leaky faucet, Removing the handle is the first step to take. With just A few tools and some basic knowledge, You can easily remove your Moen cook room faucet arm without damaging any of its components.
The first thing to do when removing your cookhouse mill handle is to turn off the water supply. This will prevent any water from spraying out while you work on the mill. Next, Use A flathead screwdriver to pry off the cap on top of the mill arm. Once removed, Unscrew and remove the screw that holds the arm in place. After this step is complete, Gently wiggle and lift off the arm from its base.
If you encounter resistance during this process, Don’t force it!
Remove the Retainer Nut Using Adjustable Pliers
Removing this nut can be quite tricky and requires some knowledge about plumbing tools. One of the easiest ways to take out the retainer nut is by using adjustable pliers.
To start with, Turn off the aqua supply valves that connect to your Moen cookhouse faucet handle. This will prevent any accidental spraying of water while working on it. Next, Locate the retainer nut which is usually found underneath the sink and hold it firmly with adjustable pliers.
Once you have A good grip on the retainer nut using your pliers, Rotate it counterclockwise until it loosens up completely. Make sure not to use excessive force as this may damage Or break certain components of your faucet system.
Remove the Cartridge
You may need to do this if your faucet is leaking Or if you need to replace old Or worn-out parts. Here’s how to remove the cartridge from your Moen cookhouse faucet handle in just A few easy steps.
First, Turn off the aqua supply to your mill by closing the valves under the sink. Next, Remove any decorative caps Or arm that cover the set screw on top of the mill handle. Once you have access to the set screw, Use an Allen wrench to loosen and remove it. Gently pull out the arm and expose the cartridge beneath it.
To remove the cartridge itself, First identify what type of Moen mill you have (single-arm Or two-handle) and whether it has A retaining clip Or nut holding it in place.
The Final Thought
It is clear that removing A Moen kitchen faucet handle requires patience and attention to detail. With the right tools and A little bit of finesse, Anyone can successfully remove their Moen cookhouse faucet arm with ease. Before attempting any task like this, Be sure to read all of the instructions carefully, Ensuring that you are familiar with all of the necessary steps. By following these simple guidelines, You should have no issues removing your kitchen mill handle safely and effectively.