
Removing a single handle cookhouse faucet is not as intimidating as it may seem. With the right tools And knowledge, You can easily replace your old faucet with a new one without any outside help. We will walk you through all the steps necessary to properly remove a single handle kitchen faucet so that you can perform this task with confidence. We’ll also provide helpful tips And tricks for tackling common installation issues And preventing future problems.
Importance Of Removing A Single Handle Kitchen Faucet
Removing a single handle cookhouse faucet may seem like a daunting task, But it’s an important one that every homeowner should know how to do. Whether You’re upgrading your tap Or repairing a leak, Removing the old one is the first step in the process. By following some simple steps, You can easily remove your single handle kitchen faucet And get started on Your next project.
The first step in removing your single grasp cookhouse tap is to turn off the water supply. This is typically located under the sink And can be turned off by turning the valve clockwise. Once you have turned off the water, Turn on your faucet to release any excess water that may be in the lines. Next, Use an adjustable wrench to disconnect the hot and cold water lines from the bottom of the tap.
After disconnecting all of the necessary components from your old tap, It’s time to remove it from its mounting location.
Here Are Some Ideas To Remove A Single Handle Kitchen Faucet
Locate The Water Shutoff Valves
Locating the water shutoff valves is an important step before removing a single handle cookhouse faucet. These valves can be found under the sink, And they control the flow of water to your faucet. Shutting off these valves will prevent any unwanted water from flowing while you remove your faucet.
To locate the shutoff valves, first turn on your kitchen tap. Then, go underneath your sink and look for two small valve handles. One valve controls hot water, And one controls cold water. Turn both handles clockwise to shut off the flow of water to your kitchen tap.
Once you have located and turned off the shutoff valves, you are ready to remove your single handle kitchen faucet. Follow these steps carefully to ensure a successful removal without damaging any parts or causing leaks. With these tips in mind, You can confidently perform maintenance tasks like removing a single handle cookhouse faucet with ease!
Turn Off The Water Supply
Removing a single grasp cookhouse tap can be a daunting task, But it’s not impossible. If you need to replace your existing one, Or just want to upgrade to something more modern, The first step is to turn off the water supply. This is important because you don’t want water spraying all over your kitchen as you remove the tap.
To turn off the water supply, Look for two valves under your sink that control the hot And cold water flow. Turning these valves clockwise will shut off the supply of water to your kitchen tap. You may also need to turn off the main valve if there aren’t any individual ones for your sink.
Once you’ve turned off the water supply, It’s time to remove the old single handle kitchen faucet. Begin by disconnecting any hoses Or pipes connected to it using a wrench Or pliers.
Turn on The Faucet To Release Any Remaining Water
Removing a single grasp cookhouse tap can be quite challenging if you don’t know the right steps to follow. Turn on the faucet to release any remaining water before you begin. This is an important step that will ensure that you don’t waste time trying to remove the tap while there’s still water in it. Once You’ve turned off the water supply, Turn on the faucet And let any remaining water flow out.
The next step is to locate the mounting nuts that hold the tap in place. These nuts are usually located under the sink And they’re connected to two long threaded rods. Use a basin wrench Or adjustable pliers to loosen these nuts by turning them counterclockwise. Once they’re loose enough, Use Your hands to remove them completely.
After removing all mounting nuts, Gently lift up the old tap until it comes loose from its position.
Use a Screwdriver To Remove The Screw From The Handle
Using a screwdriver to remove the screw from the handle of your kitchen faucet is one of the easiest And most effective methods. First, Locate where the screw is situated on your kitchen tap And use Your screwdriver to unscrew it. Once you have removed the screw, Gently pull out the handle from its position.
It is essential to ensure that you have turned off all sources of water before proceeding with removing your single grasp cookhouse tap. This will prevent any unwanted leaks Or spills during removal Or installation.
Pull Off The Handle From The Faucet Base
Removing a single handle cookhouse faucet may seem like an intimidating task to many homeowners, but with the right tools and guidance, it can be done quickly and efficiently. One of the first steps in removing a single grasp cookhouse tap is pulling off the handle from the tap base. This can be accomplished by locating the set screw on the underside of the handle and removing it with an Allen wrench.
Once you have removed the set screw, gently wiggle and twist the handle until it comes loose from the faucet base. If you encounter resistance during this step, try applying some penetrating oil or lubricant to loosen any stubborn debris or mineral buildup that could be causing resistance. Once you have successfully removed your single handle cookhouse faucet’s handle, you will gain access to its mounting hardware.
Remove Any Additional Components Beneath The Handle
Removing a single handle cookhouse faucet can seem daunting, but it doesn’t have to be. If you’re looking to replace your faucet or simply need to remove it for cleaning purposes, there are a few simple steps you can follow. One important step is removing any additional components beneath the handle.
Before attempting to remove the handle, make sure to turn off the water supply. This will prevent any leaks or damage while removing and replacing the tap. To access the components beneath the handle, use an Allen wrench or screwdriver (depending on your faucet model) to remove any screws or caps holding the handle in place.
Once you’ve removed the handle, take a look at what’s underneath. You may see additional pieces such as retaining rings or nuts that need to be removed before fully taking out the tap. Be sure to keep track of all pieces and their order for easier reinstallation later on.
Loosen Mounting Nuts Using A Basin Wrench
Removing a single grasp cookhouse tap can be a daunting task, especially if you don’t have the right tools. One of the most challenging aspects of removing a faucet is loosening the mounting nuts that hold it in place. But with the help of a basin wrench, this task can become much more manageable.
A basin wrench is designed to reach tight spaces and allows you to loosen or tighten nuts that are hard to reach using regular wrenches. To remove your single handle kitchen faucet, start by turning off the water supply valves under the sink. Then disconnect any water lines attached to your faucet using pliers or an adjustable wrench.
Next, use your basin wrench to loosen and remove the mounting nuts holding your faucet in place. Apply some pressure and turn counterclockwise until it comes loose. Finally, lift your old tap out of its position and replace it with a new one following manufacturer’s instructions.
Remove Mounting Nuts And Washers
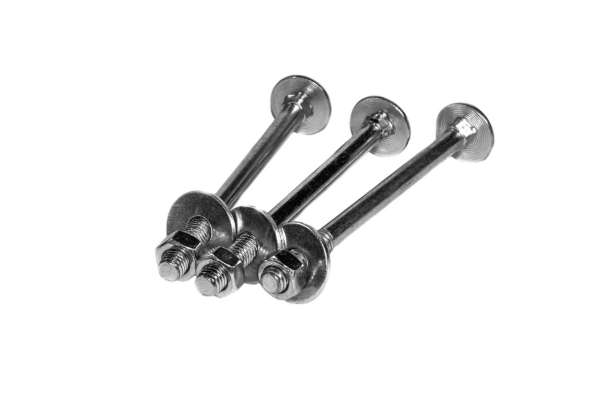
Removing a single grasp cookhouse tap can be a daunting task, but with the right tools and techniques, it can be done effortlessly. One of the essential steps in how to remove a kitchen sink faucet is to remove the mounting nuts and washers. These nuts keep the tap securely fastened to the sink or countertop, making them challenging to remove.
The first step in removing these nuts is to locate them under your sink or countertop. Once you have found them, use an adjustable wrench or pliers to loosen them counterclockwise. In some cases, they may be too tight and require additional force from a basin wrench or hammer and chisel. Be careful not to damage any surrounding components of your sink or countertop while using these techniques.
After loosening the mounting nuts, remove any accompanying washers that are keeping your faucet in place.
Detaching The Water Supply Lines
Detaching the water supply lines is an essential step when it comes to removing a single grasp cookhouse tap. This process involves cutting off the water supply and disconnecting the hoses that are connected to your tap. The first thing you need to do is turn off the valves under your sink, which will stop water from flowing into your faucet.
Once the water has been turned off, use a wrench or pliers to loosen the nuts that hold the water supply lines in place. You may find that these nuts are tight, so be sure to apply enough pressure without causing damage. Once both nuts have been removed, gently pull out each hose and set them aside.
It’s important to remember that if there’s any leftover water inside of your pipes or hoses, it will spill out once they’re disconnected. So make sure you have a bucket handy before you start detaching these parts.
Use A Cleaning Agent To Remove Any Debris
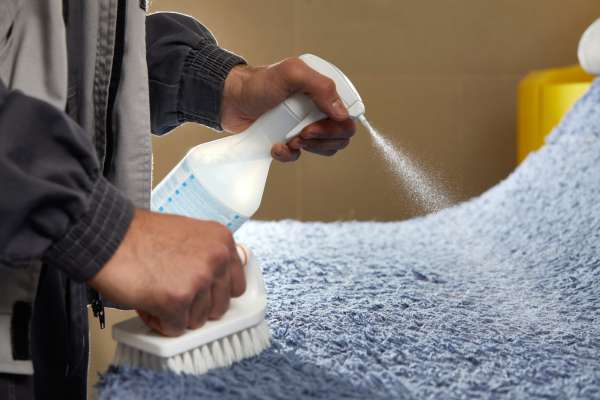
Removing a single grasp cookhouse tap can seem like quite the daunting task. However, with the right tools and some basic knowledge, it can be done in no time! One important step in this process is to use a cleaning agent to remove any debris that may have accumulated over time.
Before you begin, make sure to turn off the water supply to your faucet. You don’t want any water spraying everywhere while you’re trying to work! Next, remove the handle of your tap by loosening the set screw with an Allen wrench. Once this is done, take a look inside your tap and see if there is any debris or buildup that needs to be removed.
It’s important to use a proper cleaning agent. There are many commercial products available specifically designed for removing buildup from faucets.
Dry The Area Completely

One important step to ensure the success of this project is to dry the area completely. This means wiping down any excess water or moisture around the sink and tap.
Before beginning any work on your tap, turn off the water supply valves under the sink. Use an adjustable wrench to loosen and remove the mounting nuts that secure your old tap in place. Once these nuts are removed, lift out your old fixture carefully so as not to damage any of the surrounding surfaces.
Now that you have successfully removed your old single-grasp cookhouse tap, take some time to inspect all parts for signs of wear or damage. Replace anything that looks worn out or broken before installing your new fixture.
The Final Thought
Removing a single handle cookhouse faucet is relatively easy and straightforward when you have the right tools and materials. If you follow the steps outlined in this article, you can quickly remove your old tap and replace it with a new one. Be sure to turn off the water supply before starting, use caution when handling tools, and keep track of all pieces from the old faucet for reference when installing the new one.