
Properly cleaning your cast iron Dutch oven is essential for preserving its durability, performance, and non-stick seasoning. Whether you’re a seasoned cook or a beginner, learning the right cleaning techniques ensures your clean a cast iron Dutch oven remains a reliable kitchen companion for years. In this guide, we’ll walk you through the best practices for removing residue, preventing rust, and maintaining its natural seasoning without damage. Say goodbye to confusion and hello to a spotless, long-lasting Dutch oven. Keep reading to discover simple yet effective cleaning tips that will keep your cast iron cookware in pristine condition. Let’s dive into the secrets of cast iron care!
Essential Tools and Materials for Cleaning
For optimal cleaning of your cast iron Dutch oven, it’s crucial to have the right tools and materials at hand. A soft sponge or stiff brush will effectively remove debris without harming the surface. Mild dish soap, though often avoided to preserve seasoning, can be used sparingly if followed by thorough rinsing and drying. For tougher stains, coarse kosher salt serves as an excellent natural abrasive. Don’t forget paper towels or a lint-free cloth for drying, and vegetable oil for re-seasoning after the cleaning process. These simple items, when used correctly, help maintain the integrity and functionality of your Dutch oven.
Let the Dutch Oven Cool Before Cleaning

Before you begin the cleaning process, it’s crucial to let your cast iron Dutch oven cool completely. Sudden temperature changes can cause the iron to warp or crack, potentially ruining this valuable kitchen tool. After cooking, remove your Dutch oven from the heat source and place it on a heat-resistant surface. Allow it to reach room temperature naturally. This precaution not only protects the integrity of your Dutch oven but also makes the subsequent cleaning steps safer and more effective. By being patient, you ensure that your cookware remains in top condition, ready for your next culinary adventure.
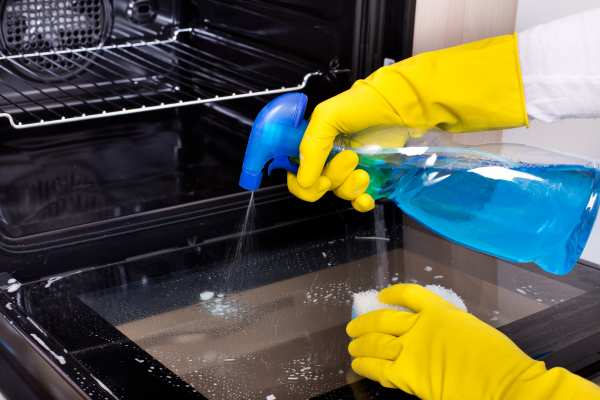
Removing Food Residue Safely
Cleaning your cast iron Dutch oven doesn’t have to be daunting. Begin by gently scraping away any leftover food with a wooden spatula, which helps preserve the seasoning by avoiding scratches. For tougher residue, boil a small amount of water in the pot, allowing the steam to loosen any stubborn bits. This method ensures you effectively clear out debris without using harsh chemicals or metal tools that could damage the surface. Remember, keeping the cleaning process gentle is key to maintaining your This oven’s longevity and cooking efficiency.
Cleaning Without Stripping the Seasoning
Maintaining the seasoning on your cast iron Dutch oven is crucial for its performance and longevity. To clean it without harming this essential layer, avoid using harsh soaps or detergents. Instead, opt for a simple scrub using warm water and a stiff brush to remove any food particles. For stubborn residues, a paste made from coarse salt and water can be gently scrubbed on the surface. After cleaning, thoroughly dry your This oven over low heat on the stove to prevent rust. This method preserves the seasoning and keeps your cast iron in top condition, ensuring it continues to enhance flavors in your meals for years to come.
How to Handle Tough Stains or Burnt-On Food
Tackling tough stains and burnt-on food from How to Clean Dutch Oven doesn’t have to be daunting. Start by sprinkling a generous amount of coarse kosher salt or baking soda onto the affected areas. Use a damp sponge or a stiff brush to gently scrub the surface, allowing the abrasive particles to lift and remove the stubborn residues effectively. Once the debris is loosened, rinse the cookware under warm water and dry it thoroughly to prevent rusting. This method not only cleans your This oven efficiently but also helps preserve its valuable seasoning, ensuring it remains in optimal condition for your next culinary adventure.
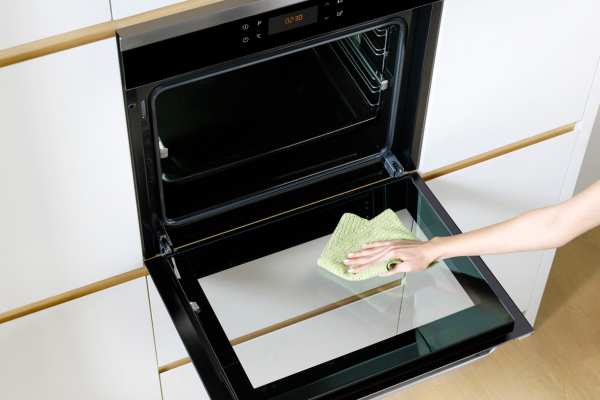
Rinsing and Drying Thoroughly to Prevent Rust
Ensuring your cast iron Dutch oven is thoroughly rinsed and dried is crucial to prevent rust and maintain its longevity. After washing, immediately rinse the cookware with warm water to remove any cleaning residue. The most critical step is drying; use a clean, dry cloth or a paper towel to wipe down every surface. For added protection against moisture, place the Dutch oven on a warm stove for a few minutes to evaporate any remaining dampness. This simple yet effective drying technique safeguards the iron from rust and keeps your This oven ready for its next culinary adventure.
Re-seasoning Your Cast Iron Dutch Oven
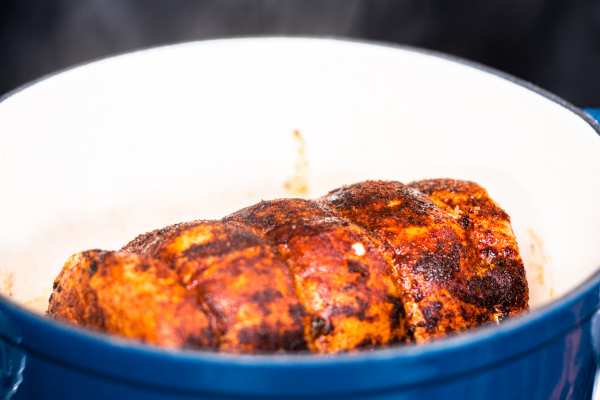
Re-seasoning your cast iron Dutch oven is a critical step to ensure its longevity and non-stick surface. Start by coating the interior and exterior with a thin layer of cooking oil after cleaning. Place the Dutch oven upside down in a preheated oven at 375 degrees Fahrenheit for one hour. This process bakes the oil into the surface, creating a durable layer of seasoning. Allow it to cool in the stove before removing. Regular re-seasoning after thorough cleanings will keep your This oven in optimal condition, enhancing your cooking experience with each use.
Proper Storage for Long-Term Care
Ensuring your cast iron Dutch oven stays in prime condition involves more than just effective cleaning; proper storage is equally crucial. Always thoroughly dry your cookware before storing to prevent rust formation. Opt for a cool, dry place and if possible, place a paper towel between the lid and the pot to allow air circulation, which helps keep moisture at bay. Additionally, a light coating of oil before storing can act as a barrier against humidity. By following these simple storage tips, your This oven will be ready for use anytime, maintaining its quality for future cooking adventures.
Avoiding Common Cleaning Mistakes
When clean a cast iron Dutch oven, it’s crucial to avoid certain pitfalls that could damage its integrity and appearance. One common mistake is using harsh detergents, which can strip the seasoning and lead to rust. Instead, opt for gentle cleaning methods such as hot water and a soft sponge. Moreover, avoid soaking the pot for extended periods, as this can also cause rusting. Thoroughly drying your This oven immediately after washing is essential to prevent moisture from degrading the metal. By steering clear of these common errors, you ensure that your cast iron cookware remains in excellent condition, ready for your next culinary adventure.
Restoring a Rusted Cast Iron Dutch Oven
Restoring a rusted cast iron Dutch oven might seem daunting, but it’s quite manageable with the right approach. Begin by scrubbing the rust off using a mixture of baking soda and water to create a gentle yet abrasive paste. Apply it on the affected areas and use a brush to scrub gently. Once the rust is removed, wash the stove with mild soap and warm water, then dry it completely. The final step is re-seasoning: coat the interior with a thin layer of cooking oil and heat it in the stove at 375 degrees for an hour. This process not only combats rust but also revives the non-stick surface, ensuring your This oven is as good as new.
Conclusion
Maintaining your cast iron Dutch oven doesn’t have to be a chore. By following the straightforward steps outlined in this guide on how to clean a cast iron Dutch oven, you can ensure your cookware continues to perform excellently and last for generations. Regular cleaning and proper care will keep it rust-free, well-seasoned, and ready for whatever delicious meal you plan next. Remember, the key to preserving this kitchen staple is as simple as cleaning, drying, and seasoning properly after each use. Embrace these habits to elevate your cooking experience and get the most out of your beloved cast iron This oven.