
Apples are nature’s delicious gift, Offering A crisp and juicy burst of flavor. But peeling them can be a laborious task, robbing you of precious time and energy. That’s where an apple peeler comes to the rescue, effortlessly transforming the peeling process into A breeze. In this article, We delve into the art of using an apple peeler, Unraveling Its secrets, And unveiling Its potential. Whether you’re A seasoned cook or an aspiring kitchen connoisseur, Learning how to harness the power of this simple yet ingenious device will elevate your apple-centric culinary adventures. From choosing the right apple peeler to mastering the technique, we’ll guide you step by step, ensuring that you unlock the full potential of this time-saving tool. So, let’s dive in and uncover the wonders of the apple peeler, Revolutionizing the way you approach peeling apples forever!
Benefits Of Using An Apple Peeler
Using an apple peeler brings A multitude of benefits to your kitchen routine. With A few swift motions, The peeler effortlessly removes the apple skin, Eliminating the need for tedious manual peeling. Moreover, An apple peeler ensures consistent and even peeling, Resulting in beautifully peeled apples every time. This not only enhances the visual appeal of your dishes but also promotes efficient and uniform cooking. Additionally, An apple peeler minimizes the risk of accidental cuts or injuries, Making It A safe and convenient tool for both experienced chefs and amateur cooks alike. Say goodbye to the hassle of hand-peeling And embrace the efficiency And convenience offered by an apple peeler.
Importance Of Knowing How To Use An Apple Peeler
Knowing how to use An apple peeler is A convenient skill that can make preparing apples for baking, Cooking, Or snacking much easier. To start using an apple peeler, Simply place the apple on the prongs of the machine and turn the handle clockwise. The blade will cut through the skin of the apple as It rotates around, Leaving you with perfectly peeled fruit in seconds! Using An apple peeler can save time And reduce waste by removing only As much skin As necessary while retaining As much of the fruit As possible. In addition to saving time, Learning how to use an apple peeler properly can also help you create beautiful baked goods with evenly sliced fruit.
Choosing The Right Apple
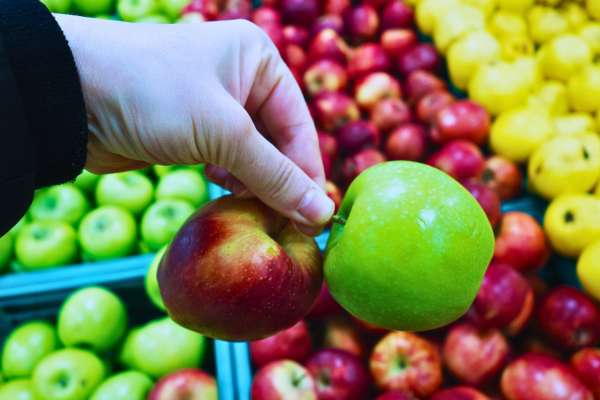
Choosing the right apple is crucial for preparing delicious recipes. Whether you want to make A pie, Sauce, Or salad, selecting the perfect It can make all the difference in your final dish.
Consider what type of recipe you are making. If you plan on baking an Apple pie, A tart Granny Smith apple would be ideal as It holds Its shape and doesn’t get too mushy when cooked. On the other hand, If you’re Making applesauce or juice, A sweeter variety like Honeycrisp Or Fuji might be better suited for your needs. Once you’ve chosen your apple variety, It’s time to prepare them for cooking. One of the most efficient ways to do so is by using An Apple peeler.
Washing And Drying The Apple

Washing And drying fruit is an essential step before consumption. Not only does It remove any dirt or residue. It also helps to eliminate Harmful bacteria that may be present on the surface of the fruit. To begin, Rinse your apples under cool running water to remove any dirt or debris from the skin. If you are using Place the apple on the prongs and turn the handle slowly to remove the skin in a spiral motion. This will not only save time, but it will also create uniform slices for snacking or baking.
Removing Any Stickers Or Labels

To use the pampered chef apple peeler and apple corer for removing stickers or labels, start by placing the label side of the object on a flat surface. Next, position the sharp end of the apple core over one of the corners of the label. Press down firmly on the handle of the apple corer to puncture through the label and into whatever surface it is stuck to. Twist and turn the apple core until you have cut through all sides of the label.
Adjusting The Blades

Adjusting the blades of your corer may seem like A tedious task, But It is actually quite easy And essential for getting the most out of your tool. Once you have removed the screws, Gently lift off the top blade to reveal the bottom blade. This is where you can make adjustments to achieve your desired slice thickness. To reduce thickness, Move both blades closer together by adjusting their alignment with each other. For thicker slices, move them further apart.
It’s important to note that different types of apples require different blade settings. For example, Sweeter apples tend to have softer flesh and require a thinner setting to get clean slices without crushing them.
Securing The Apple Peeler To A Stable Surface

Securing your apple peeler to a stable surface is crucial to ensure A smooth and efficient peeling experience. Find A sturdy countertop or table that offers A secure grip. Many apple peelers come with suction cups or clamps that can be attached to the surface, providing stability during operation. Ensure that the surface is clean and dry before attaching the peeler. This prevents any accidental slipping or movement while peeling, allowing you to maintain control and achieve consistent results. A securely anchored Vegetable peeler not only enhances safety but also enables you to effortlessly glide through the apples. Saving time and ensuring S hassle-free peeling process.
Turning The Handle To Peel The Apple

“Turning The Handle To Peel The Apple” is the next step in the peeling process. Once the Apple is securely positioned on the peeler, Grasp the handle firmly with one hand while holding the base of the peeler with the other. Begin turning the handle in A clockwise motion, Applying steady and consistent pressure. As the handle turns, The blades of the peeler will rotate, Effortlessly removing the skin from It. Continue turning until the entire apple has been peeled, revealing the smooth and crisp flesh beneath.
Using A Knife To Remove Any Remaining Peel

“Using A Knife To Remove Any Remaining Peel” is a final touch to ensure a perfectly peeled. After using a peeler, there may be small patches of peel left behind. Take a sharp knife and carefully trim away any remaining peel on the apple’s surface. Be cautious not to remove too much flesh. This step guarantees a smooth and uniform appearance, enhancing both the aesthetic appeal and texture of It. By utilizing a knife, you can achieve flawlessly peeled apples, ready to be enjoyed in your favorite recipes.
The Final Thought
Mastering the art of using an apple peeler can greatly simplify your kitchen tasks and elevate your culinary creations. By following the steps outlined in this article, from positioning the apple on the peeler to turning the handle and collecting the peelings, You can effortlessly peel apples with precision and efficiency. Remember to utilize A knife to remove any remaining peel for A flawless finish. Whether you’re preparing A delicious apple pie, A refreshing fruit salad, Or simply enjoying a crisp and peeled apple as A healthy snack, The techniques shared here will make the process easier And more enjoyable. Embrace the convenience of a Vegetable peeler and unlock A world of possibilities in your kitchen. Happy peeling!