
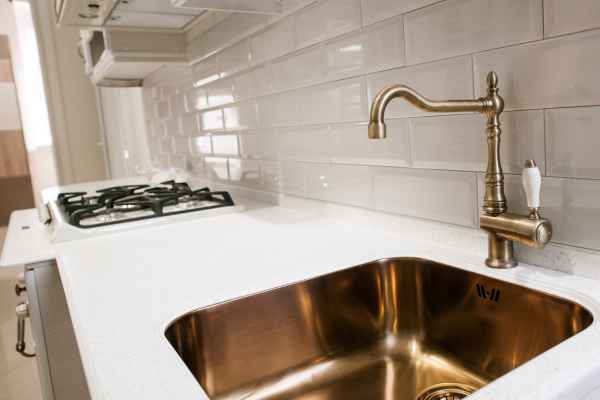
Embarking on a home improvement journey can be both thrilling and daunting, especially when it comes to upgrading the heart of your home – the kitchen. One key component that often needs attention is the kitchen tap. Whether it’s due to wear and tear, a desire for a modern upgrade, or a simple change in style, replacing a kitchen faucet can dramatically transform your space. This guide aims to simplify the process, walking you through the essential steps to replace your kitchen faucet with ease. From selecting the right tools to ensuring a smooth installation, we’ll cover all the bases, making sure your kitchen revamp is a success.
How do I change my kitchen sink faucet?
Changing your kitchen sink faucet is a manageable DIY task that can significantly enhance your kitchen’s functionality and appearance. Start by turning off the water supply to your sink, typically found under the sink. Open the faucet to release any remaining water and pressure. Next, disconnect the water lines from the old tap using an adjustable wrench; have a bucket handy to catch any drips.
Then, remove the mounting nuts that secure the faucet to the sink. Once these are off, you can lift out the old tap. Clean the area around the sinkhole to ensure a smooth installation of the new tap. Position the new tap in the sinkholes and secure it with the provided mounting hardware. Reconnect the water lines, ensuring they are tight to prevent leaks. Finally, turn the water supply back on and test the new faucet for proper operation and any leaks.
Benefits of How To Replace Kitchen Faucet
Enhanced Functionality
Upgrading to a new kitchen faucet introduces modern functionalities, like flexible pull-down sprayers and adjustable water flow, streamlining your kitchen chores. This enhancement means less time spent on tasks like filling pots or rinsing dishes, making kitchen work more efficient and enjoyable.
Water Efficiency
New kitchen faucets are often designed with water conservation in mind. By replacing an older model with a water-efficient one, you can significantly reduce water usage, leading to lower utility bills and a positive environmental impact. This simple change is a step towards sustainable living practices.
Aesthetic Improvement
Installing a new kitchen faucet is a quick way to revamp your kitchen’s style. Whether you’re aiming for a sleek, modern look or a more classic design, a wide range of tap styles and finishes can dramatically enhance your kitchen’s aesthetic appeal, complementing and elevating its overall design.
Increased Property Value
Even a minor upgrade like a new kitchen faucet can boost your home’s market value. This improvement not only adds functional value but also appeals aesthetically to potential buyers. It’s a cost-effective way to make your kitchen look more modern and well-maintained, attracting more interest in the property market.
Reduced Maintenance and Leak Risks
Older faucets are more prone to leakage and wear, which can lead to costly repairs. Replacing your kitchen tap can mitigate these risks, offering peace of mind and saving you from frequent maintenance issues. New faucets typically come with better durability and warranty, ensuring long-term reliability.
Here Are Some Ideas on How To Replace Kitchen Faucet
Turn Off Water Supply

Before embarking on the task to replace your kitchen faucet, the first crucial step is to turn off the water supply. This is typically done by locating the valves under the sink. These valves control the flow of water to your faucet. Turning them clockwise will usually stop the water supply. It’s essential to ensure that the water is completely shut off to avoid any accidental spillage or flooding. Once you have turned off the valves, open the faucet to release any residual water and pressure in the pipes, ensuring a dry work area.
Release Pressure

After shutting off the water supply, it’s important to release any remaining pressure in the water lines. This step is crucial to prevent water from gushing out once you start disconnecting the tap. To do this, simply open the tap and let any trapped water and pressure escape. You might hear a hissing sound as the pressure releases, which is a normal part of the process. Ensure all the water has drained out and the lines are pressure-free before moving on to the next step.
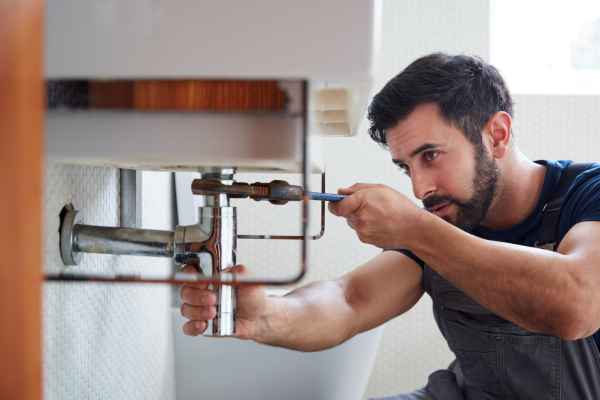
Disconnect Water Lines

With the pressure released, the next step involves disconnecting the water lines from the old faucet. This can be done using an adjustable wrench or a basin wrench. Carefully unscrew the nuts connecting the water lines to the tap. It’s a good idea to place a bucket or towel underneath to catch any dripping water. Remember to note how the lines were connected, as this will help you when installing the new tap.
Remove Old Faucet

Now, it’s time to remove the old faucet. This usually involves loosening the nuts or bolts that secure the tap to the sink. Depending on your sink’s configuration, you might need to do this from under the sink. Once the nuts are loosened, you can gently lift the tap away from the sink. If it’s stuck due to years of mineral buildup, gently wiggle it back and forth until it comes loose.
Clean Sink Surface

Before installing the new faucet, take a moment to clean the sink surface. This is an excellent opportunity to remove any grime, soap scum, or mineral deposits that have accumulated around the old faucet’s base. A clean surface ensures a better seal for the new tap and improves the overall appearance of your sink area. Use a suitable cleaner and a non-abrasive scrubbing pad to avoid scratching the sink.
Check Compatibility
The final step before installing the new faucet is to check its compatibility with your sink. Ensure that the size and type of the tap match your sink’s configuration. Pay attention to the number of holes in your sink and their spacing. If your new tap has fewer holes than your sink, you might need an escutcheon plate to cover them. Also, check the length of the water line connectors and ensure they match with the existing supply lines.
Position New Faucet
Once your sink area is prepared, it’s time to position the new faucet. Carefully feed the faucet’s lines through the appropriate holes in your sink. Make sure the faucet is aligned correctly, with the spout facing the right direction and the handles in the proper orientation. It’s important to ensure that the tap sits evenly on the sink without any tilting. If your new tap includes a gasket, place it between the faucet and the sink to create a watertight seal.
Secure Faucet
After positioning the faucet, go beneath the sink to secure it in place. This typically involves attaching and tightening the nuts and washers provided with the tap. Ensure that these are fastened securely to prevent the tap from moving or becoming loose over time. However, be careful not to over-tighten, as this could damage the nuts or the sink itself. Once secured, double-check the alignment of the tap from above the sink.
Connect Water Lines

The next step involves connecting the water supply lines to the new tap. First, identify the hot and cold lines and connect them to the corresponding valves under the sink. Use an adjustable wrench to tighten the connections. It’s crucial to ensure a snug fit to prevent leaks but, similar to securing the tap, avoid over-tightening as this can strip the threads or damage the lines.
Apply Plumber’s Tape
To ensure a leak-proof connection, apply plumber’s tape (also known as Teflon tape) to the threads of the water line connections. Wrap the tape clockwise around the threads a few times. This helps to fill any gaps in the threads and prevents water from seeping through. Plumber’s tape is an inexpensive yet effective way to enhance the seal of your plumbing connections.
Test for Leaks
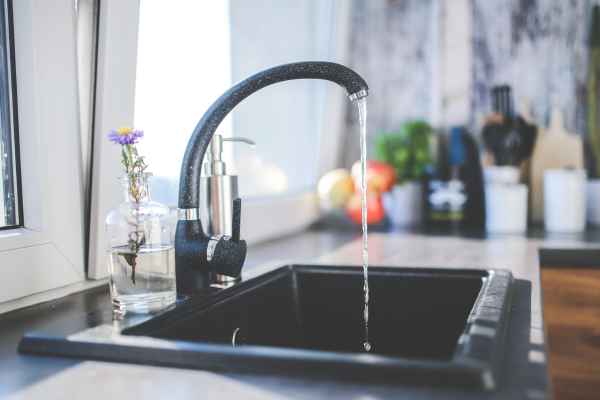
With everything connected, it’s time to test for leaks. Turn the water supply back on and carefully observe the connections under the sink and the faucet itself for any signs of leaking. Turn the tap on and off several times and check both the hot and cold water functions. If you notice any drips, turn off the water supply and tighten the connections a bit more, then test again.
Install Drain Stopper
Finally, if your faucet set includes a drain stopper, install it according to the manufacturer’s instructions. This often involves inserting the stopper into the drain hole and connecting it to the control rod beneath the sink. Adjust the mechanism so that the stopper opens and closes properly when you operate the lift rod on the faucet.
The Final Thought
Mastering how to replace a kitchen faucet is a skill that not only enhances the functionality and aesthetics of your kitchen but also instills a sense of accomplishment in your DIY endeavors. As you’ve seen, with the right tools, a bit of patience, and careful attention to detail, this task can be completed efficiently, transforming your kitchen space. Remember, the key to a successful faucet replacement lies in careful preparation and following each step methodically. Whether it’s ensuring the compatibility of your new faucet with existing plumbing or meticulously sealing connections to prevent leaks, each action contributes to a flawless finish.