
Removing A kitchen countertop can be A daunting task, But with the right guidance, It can be A manageable DIY project. Whether you’re looking to upgrade your kitchen or replace A damaged countertop, The first step is understanding how to remove the existing one. Begin by disconnecting any appliances, Such as your sink And stove, To ensure A safe workspace. Carefully remove any caulk or adhesive securing the to the cabinets. Use A utility knife or A putty knife for this task. Once It’s loosened, gently pry the away from the base, Taking care not to damage the cabinets. Enlist A helper if the is large or heavy. Remember to turn off the power to any electrical outlets before working near them. With patience and the right tools, You’ll have that old removed in no time, Making way for your kitchen renovation dreams to come true.
How Do I Choose The Right Replacement Countertop Material?
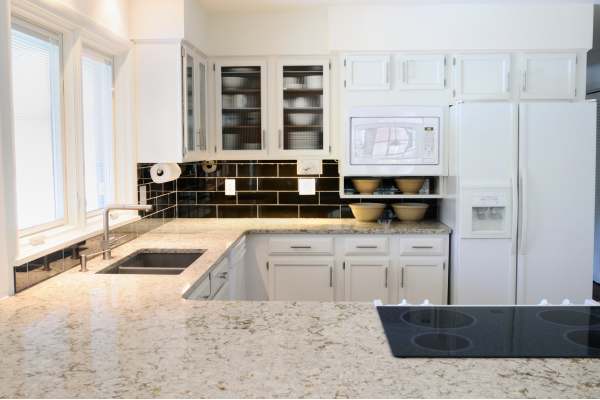
Choosing the right replacement countertop material can be overwhelming, But there are A few factors to consider that can help you make an informed decision. Think about your budget And how much you are willing to spend. Different materials vary in price, So it’s important to have A clear idea of what you can afford. Consider your lifestyle and how you use your countertops. If you have A busy kitchen with heavy usage, Durable materials like granite or quartz may be better options. Think about the aesthetic appeal And design of your kitchen. Look for materials that complement your existing decor and style preferences. By considering these factors, You can choose the right replacement material that suits your needs And preferences perfectly.
How Can I Avoid Damaging The Kitchen Sink During Removal?
To avoid damaging the kitchen sink during removal, It is important to follow A few key steps. Make sure to turn off the water supply And disconnect any plumbing connections. This will prevent any leaks or water damage during the removal process. Carefully remove any caulking or adhesive around the edges of the sink using A putty knife or scraper. Take your time and be gentle to avoid scratching or chipping the sink surface. Use A wrench or screwdriver to loosen And remove any mounting clips or brackets that are holding the sink in place. By taking these precautions And being cautious throughout the removal process, You can minimize the risk of damaging your kitchen sink.
Importance of Removing kitchen countertop
Removing A kitchen countertop can be an important step in various scenarios. If you are planning to renovate your kitchen, Removing the is necessary to make way for new materials And designs. This allows you to create A fresh and updated look for your space. Additionally, Removing the it can also be essential If there are any underlying issues such as water damage or mold that need to be addressed. By removing them, You can assess And fix these problems before installing A new kitchen countertop, Ensuring A safe And durable kitchen surface. Overall, removing the kitchen countertop is crucial
Here’s How To Remove Kitchen Countertop
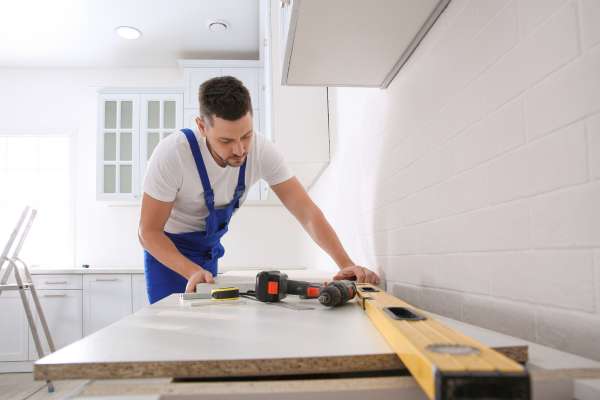
Gather Your Tools
Before diving into This DIY project, Make sure you have the right tools on hand. You’ll need basic tools such as A screwdriver, Utility knife, pry bar, Hammer, Adjustable wrench, Putty knife, And A bucket. Don’t forget to prioritize safety with gloves And safety glasses.
Turn Off Utilities

To turn off the water supply lines connected to the kitchen sink, Locate the shut-off valves usually located under the sink. Turn them clockwise until they stop rotating. This will block any water flow And prevent any leaks during countertop removal. For gas appliances such as stoves or ovens, Switch off their individual gas shut-off valves typically near each appliance or at the main gas supply line in your home. Remember safety first; If you’re unsure how to proceed with shutting off gas lines, Consult A professional.
Remove Sink And Appliances
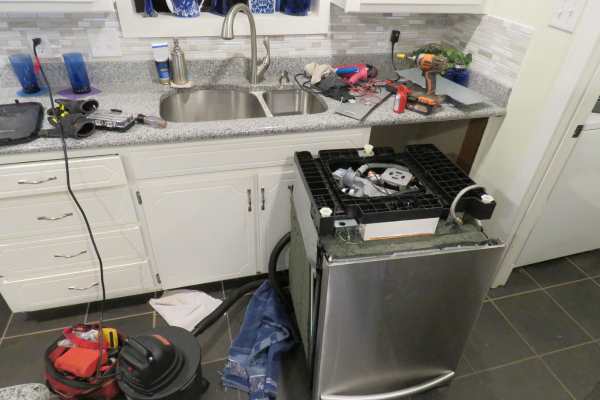
Removing sinks And appliances can be a daunting task, But with the right tools and A little bit of patience, It can be done smoothly And efficiently. Start by disconnecting any electrical or plumbing connections to ensure safety. By turning off the power supply and shutting off the water valves, You can avoid any potential accidents. Remember that removing sinks and appliances requires caution and careful planning. Take your time to avoid any mishaps or injuries during the process. With these tips in mind, You’ll be well-equipped to tackle this task successfully without leaving A trace of your existence behind! So go ahead – give your kitchen A fresh new look by removing those old fixtures!
Detach Backsplash

To remove the backsplash, Start by carefully prying it away from the wall using A putty knife or A crowbar. Be sure to work slowly And gently to avoid damaging the wall or any surrounding tiles. Once you’ve detached the majority of the backsplash, Use A heat gun or hairdryer to soften any adhesive that may still be holding It in place.
As you detach the backsplash, Take note of any damage or wear on your existing countertop. This could be an opportunity for an upgrade or replacement if needed. Additionally, Consider how removing the backsplash might affect other elements in your kitchen such as lighting fixtures or cabinets. By taking these factors into account And following these steps, You’ll be well on your way to achieving A beautiful and modern kitchen space
Unscrew Countertop
Begin by locating And removing any screws or fasteners that secure the countertop to the base cabinets. These are typically found underneath the countertop. Using A screwdriver or an electric drill, Carefully unscrew And remove all fasteners. Keep these screws in A safe place, as you may need them when installing the new countertop.
Pry The Countertop
Once you’ve successfully removed any screws or fasteners securing the countertop, It’s time to gently pry It away from the cabinets. Use A pry bar or A putty knife to carefully separate the countertop from the cabinet base. Start at one edge And work your way around, Being cautious not to damage the cabinets or the itself. Apply consistent, Gentle pressure until the countertop begins to lift.
Cut Through Adhesive
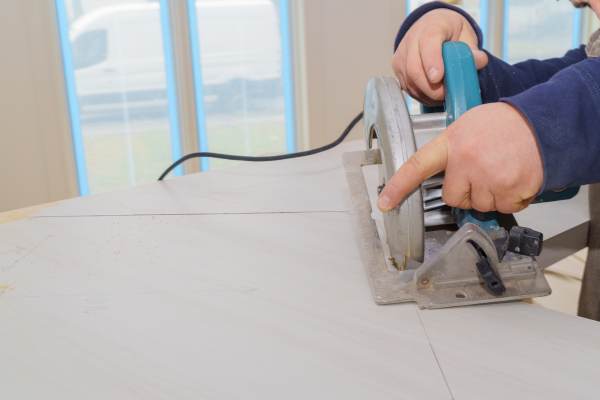
Many countertops are also secured with adhesive to ensure A strong bond. To release the countertop completely, You’ll need to cut through this adhesive. A utility knife is your best friend here. Slide the knife carefully between the And cabinet base, Cutting through any adhesive or caulk. Take your time And work systematically around the perimeter until the is entirely free. These steps are pivotal in the removal process, setting the stage for your kitchen’s transformation. Stay tuned for our upcoming blog post, Where we’ll guide you through the subsequent stages of your kitchen renovation journey.
Lift And Remove

Once you’ve successfully pried the countertop And cut through any adhesive, It’s time to lift And remove It. Enlist A helper if needed, As countertops can be heavy. Lift the carefully, Taking care not to damage the cabinets or the countertop itself. Set It aside in A safe area, As you may want to repurpose or recycle it.
Dispose Of Or Repurpose

Decide whether you want to dispose of the old countertop or repurpose It for another project. If It’s still in good condition, You might consider donating It or finding creative ways to reuse It, Such as crafting custom shelves or A tabletop.
Clean And Prepare

Thoroughly clean the countertop base to remove any debris, Dust, Or adhesive residue. A clean surface is essential for A smooth installation of your new countertop. Ensure the floor is level And stable to provide A solid foundation for your upcoming renovation.
Common Challenges and Troubleshooting
Dealing with Stubborn Adhesive or Caulk
Removing A countertop often means dealing with layers of adhesive or caulk. To tackle this, Gather essential tools like A utility knife, Putty knife, heat gun, And safety gear. Start by identifying the type of caulk or adhesive used. Safely heat and soften the material with the heat gun, Then carefully cut And scrape it away. Clean the countertop base thoroughly to prepare it for the new surface.
Repairing Any Damage to Base Cabinets
Before installing A new countertop, inspect your base cabinets for any damage. Minor nicks And scratches can be repaired with filler or putty. For more significant issues, Reinforce weakened areas with additional screws or brackets. Sand And repaint or refinish cabinet surfaces as needed to ensure they look And function their best. Finally, Make sure your cabinets are level And secure before installing the new countertop.
Addressing Unexpected Issues
Unforeseen challenges can arise during countertop removal. Structural problems, Hidden plumbing or electrical lines, And mold or water damage may require immediate attention. Consult professionals for structural issues, Turn off utilities reroute systems as needed for hidden utilities, and promptly address mold or water damage to create A safe And healthy kitchen environment.
The Final Thought
In the world of DIY home improvement, Flexibility is key. Unexpected issues can be challenging, But with the right approach, They can also be opportunities for improvement. By staying vigilant, Consulting professionals when needed, And prioritizing safety, You can successfully navigate unexpected challenges during your kitchen countertop removal project. Remember, A well-prepared And adaptable mindset can turn hurdles into stepping stones toward the beautiful kitchen you envision.