
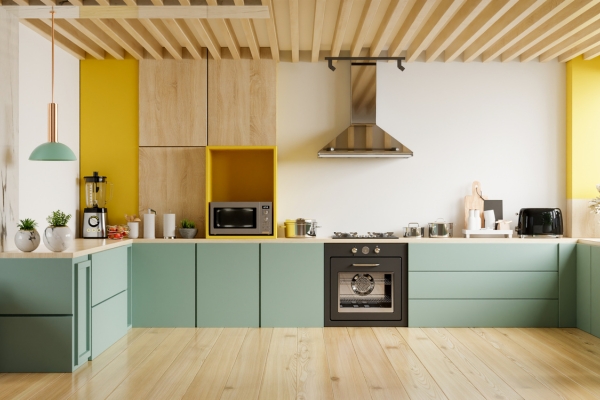
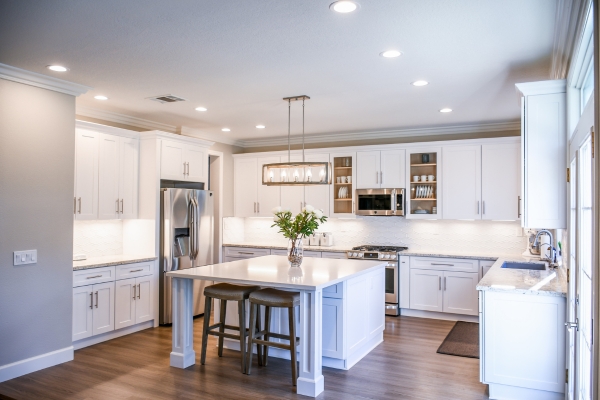
Creating your own kitchen furniture can be a rewarding and cost-effective way to personalize your home. In this guide on how to make kitchen furniture, we’ll explore step-by-step instructions, essential tools, and materials needed to build various pieces, from cabinets to tables. Whether you’re a seasoned DIY enthusiast or a beginner, this comprehensive tutorial will provide you with the knowledge and confidence to craft beautiful and functional furniture for your kitchen. Embrace your creativity and get ready to transform your kitchen space with custom-made furniture that reflects your unique style and meets your practical needs.
How Long Does It Take To Make Kitchen Furniture?
The time required to make kitchen furniture varies greatly depending on the complexity of the project, the type of furniture, and your skill level. Simple projects like a basic kitchen table or open shelving can be completed over a weekend, while more intricate pieces like custom cabinets or an island may take several weeks. Planning and preparation play crucial roles in determining the timeline; meticulous measuring, cutting, and assembling can significantly extend the process. Additionally, factors such as the drying time for finishes and paint, as well as any unforeseen challenges, can impact the overall duration. However, with careful planning and a dedicated approach, creating your own kitchen furniture can be a manageable and fulfilling endeavor.
What Is The Best Wood For Kitchen Furniture?
Selecting the right wood for kitchen furniture is essential for ensuring durability, functionality, and aesthetic appeal. Hardwoods like oak, maple, and cherry are among the best choices due to their strength and resilience. Oak is particularly popular for its robustness and distinct grain patterns, making it ideal for high-traffic areas. Maple offers a smooth, fine grain and can withstand heavy use, making it suitable for cabinets and countertops. Cherry, with its rich color and smooth texture, adds a touch of elegance and ages beautifully over time. While hardwoods are often preferred for their longevity, some softwoods like pine can also be used for less demanding applications or for a rustic look. Ultimately, the best wood for kitchen furniture depends on your specific needs, style preferences, and budget.
Tools And Materials Needed
Essential Tools
To Build Kitchen Furniture, You’ll Need Some Essential Tools:
- Measuring Tape
- Saw (Circular Or Table Saw)
- Drill And Drill Bits
- Screws And Nails
- Sandpaper
- Clamps
- Wood Glue
Steps To Make Kitchen Furniture
1. Planning and Designing
The first step in making kitchen furniture is thorough planning and designing. Start by identifying the specific pieces you want to create, whether it’s cabinets, a kitchen island, or a dining table. Measure the available space in your kitchen to ensure a perfect fit. Sketch detailed designs, including dimensions, materials, and features like shelves or drawers. Consider the style you want to achieve and how the new furniture will complement your existing decor. This planning phase is crucial as it sets the foundation for the entire project, ensuring that you have a clear vision and all necessary materials before you begin.
2. Cutting the Wood
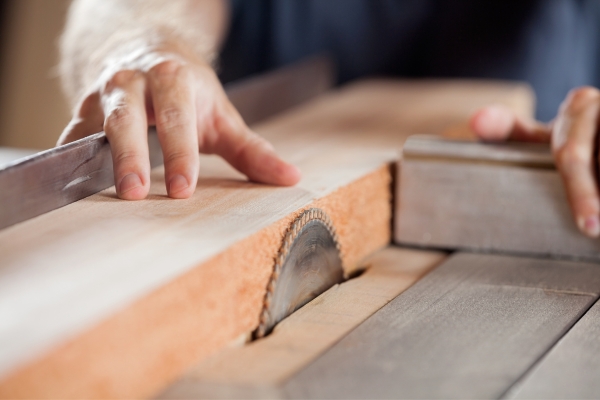
Once you have your design finalized, the next step is cutting the wood. Choose high-quality wood suitable for kitchen use, such as oak, maple, or cherry. Use precise measurements from your design plans to mark the wood. Employ tools like a table saw, miter saw, or circular saw to make accurate cuts. Safety is paramount during this phase, so always wear protective gear and follow best practices for operating power tools. Accurate cutting is essential to ensure that all pieces fit together perfectly during assembly, reducing the need for adjustments and ensuring a sturdy final product.
3. Assembling the Cabinet Box
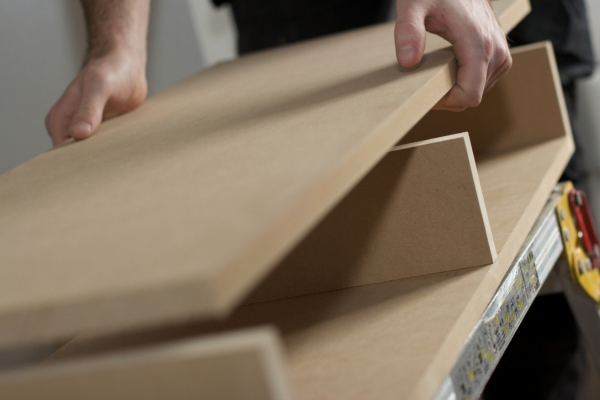
After cutting all the necessary pieces, it’s time to assemble the cabinet box. Begin by laying out the cut wood pieces according to your design. Use wood glue and clamps to hold the pieces together temporarily. Ensure all corners are square and edges align properly. Secure the joints with screws or nails, reinforcing the structure. For added durability, consider using dowels or pocket holes. Once the main box is assembled, attach the back panel, shelves, and any additional features like drawer slides or doors. Sand all surfaces to ensure smoothness, then finish with paint, stain, or varnish to protect the wood and enhance its appearance. This step transforms your individual pieces into a functional piece of kitchen furniture, ready for installation and use.
4. Adding Shelves
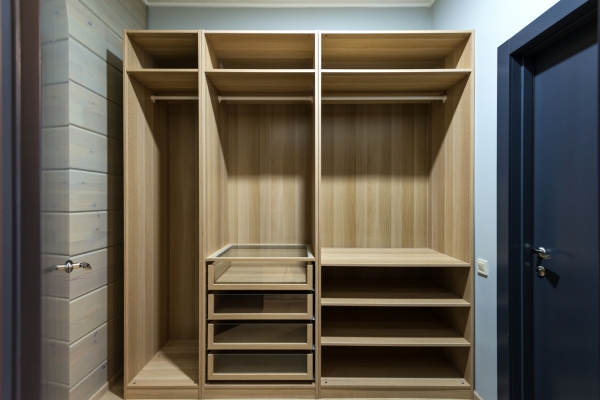
With the cabinet box assembled, the next step is adding shelves. Measure the interior dimensions of the cabinet to ensure a precise fit for the shelves. Cut the wood for the shelves, ensuring they are level and properly supported. Use shelf pins, brackets, or cleats to secure the shelves inside the cabinet. Make sure they are evenly spaced and can hold the weight of items you plan to store. Sand the edges and surfaces of the shelves to smooth out any roughness, and finish them with paint, stain, or varnish to match the rest of the cabinet. Adding shelves increases the functionality and storage capacity of your kitchen furniture.
5. Making and Attaching Doors
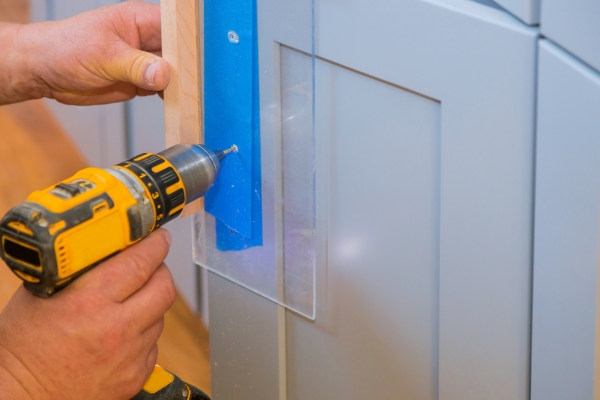
The next step involves making and attaching doors to your cabinet. Measure the openings of the cabinet to determine the size of the doors. Cut the wood for the door panels, ensuring they are slightly smaller than the opening for a proper fit. You can choose from various door styles, such as slab, shaker, or raised panel, depending on your design preference. Assemble the doors using wood glue and clamps, and reinforce with screws if necessary. Sand the doors smooth and finish them to match the cabinet. Attach hinges to the doors and then to the cabinet, ensuring they are level and open smoothly. Install handles or knobs to complete the look and enhance functionality.
6. Finishing Touches
The final step in making kitchen furniture is applying the finishing touches. Inspect the entire piece for any imperfections, filling gaps or holes with wood filler and sanding as needed. Apply a final coat of paint, stain, or varnish to protect the wood and achieve the desired look. Consider adding decorative elements such as trim or molding to enhance the aesthetic appeal. Install any additional hardware, such as soft-close mechanisms for drawers and doors, to improve functionality. Finally, ensure everything is securely assembled and performs as intended. These finishing touches bring your kitchen furniture project to completion, resulting in a beautiful, customized piece that enhances your kitchen space.
How Do I Ensure My Furniture Is Durable?
Ensuring the durability of your kitchen furniture involves several key practices. First, choose high-quality materials, such as hardwoods like oak, maple, or cherry, which are known for their strength and longevity. Proper construction techniques are also vital; use strong joints like dovetail or mortise and tenon, and reinforce connections with wood glue and screws. Ensure all pieces fit together precisely to avoid strain on the structure. Additionally, finish the wood with protective coatings like varnish, polyurethane, or paint to shield it from moisture, heat, and wear. Regular maintenance, such as cleaning and periodic refinishing, also extends the life of your furniture. By following these steps, you can create kitchen furniture that is not only beautiful but also built to withstand the test of time.
Conclusion
Creating kitchen furniture yourself is a rewarding process that combines creativity, skill, and practicality. From careful planning and designing to precise cutting and assembly, each step plays a crucial role in producing durable and aesthetically pleasing pieces. By choosing high-quality materials, employing robust construction techniques, and adding protective finishes, you can ensure your furniture stands up to daily use. The effort you put into making custom kitchen furniture will pay off, resulting in unique and functional pieces that enhance the beauty and utility of your home. With patience and attention to detail, you can craft kitchen furniture that reflects your style and meets your needs for years to come.