
Milkshakes are A timeless treat that has delighted taste buds for generations. Whether you want to cool down on A scorching summer day or satisfy A sweet tooth craving, learning how to make A milkshake with A blender is an essential skill for any dessert enthusiast. A blender is A key tool that will help you achieve the perfect creamy And frothy consistency, Making your milkshake irresistible. In this Article, We will guide you through the step-by-step process of crafting delicious milkshakes using just your trusty blender. We will explore various flavor combinations, From classic chocolate And vanilla to exotic Fruit-infused creations, Ensuring there’s Something for everyone’s palate.
Prepare Your Blender

To ensure your milkshake is perfect, it all starts with the preparation of your blender. A well-prepared blender is vital as it will affect the blend and texture of your milkshake. The blender should be assembled correctly, with the blade in place and the jar positioned right. Don’t forget to check the power cord and plug as well for safety reasons. Before using the blender, it’s also essential to familiarize yourself with the different settings to achieve your desired consistency. Lastly, Place your blender in an area where It is easy to clean, As the blending process can sometimes be messy. Preparing your blender correctly will set the stage for A delicious And satisfying milkshake.
Ensure The Blender Is Clean And Ready For Use

Your blender’s cleanliness directly impacts the flavor and healthiness of your milkshake. A clean Mixer will prevent unwanted flavors from spoiling the taste of your Malted. Make sure to clean the Mixer thoroughly after every use, paying special attention to the blades as particles can often get stuck. Also, after washing, dry all parts completely to avoid any water diluting your milkshake or causing any electrical problems. A clean blender and ready blender will not only ensure a delicious milkshake but also extend the life of your kitchen appliance.
Measure And Add The Liquid Milk

Accurate measurement is crucial to achieving the perfect milkshake consistency. Too much liquid will make your milkshake runny, While too little may cause It to be overly thick. Most Malted recipes call for About one to two cups of milk for two servings. Pour the milk into your prepared Mixer, taking care to avoid spillage. You can use any type of milk you prefer – full cream for A richer taste, Skim for A healthier option, Or non-dairy alternatives for those with dietary restrictions. The type and amount of milk you use can significantly impact the flavor And texture of your Malted, So choose wisely.
Add Ice Cream Or Frozen Yogurt

Adding ice cream or frozen yogurt to your milkshake will give It that classic, Creamy texture we all love. Typically, about two to three scoops of ice cream or fixed yogurt are enough for A two-serving Malted. The flavor of the ice cream or frozen yogurt can dictate your milkshake’s overall taste, So pick your favorite! Whether it’s the traditional vanilla, sweet strawberry, Rich chocolate, Or an exotic flavor, Each adds A unique touch. For A healthier option, you can opt for low-fat or non-dairy alternatives. But remember that It may slightly alter the milkshake’s consistency and taste. Adding the right amount And flavor of ice cream or fixed yogurt is key to making A deliciously indulgent Malted.
Secure The Blender Lid Tightly
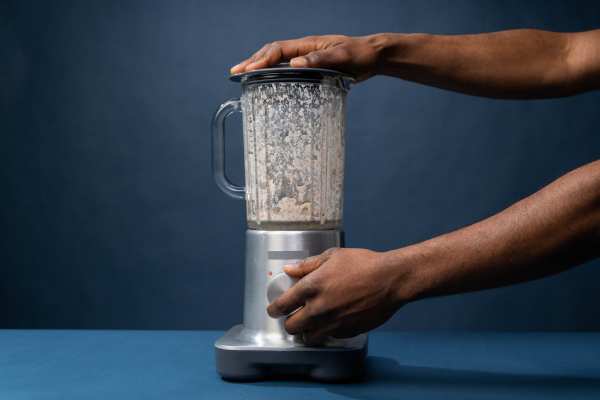
Securing the Mixer lid tightly is an important safety step to prevent any accidents during the blending process. A loose lid can cause the mixture to spill out, creating a mess and potentially damaging your Mixer or causing injury. After Adding your ingredients to the Mixer, Place the lid on top and ensure It is firmly set. Most blenders have A locking mechanism, so make sure to engage that if applicable. Always hold the lid down with one hand while blending, even if the lid seems secure. This will help keep everything contained, ensure a smooth blending process, and leave you with a perfectly mixed Malted to enjoy.
Adjust The Consistency And Flavor

After blending your milkshake, The next step is to adjust its consistency and flavor. If it’s too thick, Add more milk slowly, blending in between until the desired consistency is reached. If It’s too thin, Add A little more ice cream or fixed yogurt. Next, Taste your milkshake. If the flavor isn’t quite right, consider adding more ice cream for sweetness, A pinch of salt to enhance flavor, Or A touch of vanilla extract for depth. Remember, It’s important to add additional ingredients sparingly, blending And tasting in between, to ensure you don’t overdo It. Creating the perfect Malted is an art, And adjustment is A key step in the process.
Serve And Presentation

Presentation is everything. Pour your perfectly blended Malted into A tall glass and top It off with A dollop of whipped cream for that classic Malted look. Add some sprinkles, A cherry, Or perhaps A drizzle of chocolate or caramel sauce for an extra touch of indulgence. Serving with A brightly colored straw not only adds to the visual appeal but also makes it easier to enjoy your delicious creation. Remember, We eat with our eyes first, so A beautifully presented Malted will taste even better!
The Final Thought
Making A milkshake with A blender is A fun and easy process that allows for endless flavor combinations and adjustments. With the right preparation, The right ingredients, And A dash of creativity in serving, You can enjoy A restaurant-quality milkshake right in the comfort of your own home. Always remember that the key to A great milkshake is A balance in taste and texture, And of course, It’s all about enjoying the process! So get blending, And enjoy your delicious homemade milkshake.