A spotless kitchen floor is more than just a visual delight—it’s a reflection of hygiene, maintenance, and overall home care. Kitchen tiles endure a daily onslaught of food spills, grease splatters, and foot traffic, making regular cleaning essential. Left unattended, dirt and grime accumulate, embedding themselves into grout lines and dulling the tile’s natural luster. A well-maintained kitchen floor not only enhances the aesthetic appeal of the space but also prolongs the lifespan of the tiles, ensuring a clean and sanitary cooking environment.
1. Understanding Different Types of Kitchen Floor Tiles
Every tile has its own personality and quirks. Ceramic tiles, widely admired for their affordability and resilience, are simple to wipe clean. Nonetheless, grime that accumulates in the grout lines can mar an otherwise polished look. Porcelain tiles, a step up in terms of durability, resist stains more proficiently but still demand consistent upkeep.
Marble tiles, associated with luxury, reward gentle care with a luminous sheen that reflects light elegantly, though excessive scrubbing can cause scratches. Vinyl and laminate tiles, frequently chosen for cost-effectiveness, can warp if exposed to excessive moisture. Meanwhile, natural stone tiles, such as slate or travertine, require pH-neutral agents to prevent etching. Each variety benefits from a tailored approach when planning how to clean kitchen floor tiles without damage.
2. Essential Tools & Cleaning Supplies for Kitchen Floor Tiles
Having the right tools and solutions makes cleaning efficient and effortless.
- Microfiber mop – Traps dirt without leaving streaks.
- Soft-bristle brush – Ideal for scrubbing grout without causing scratches.
- Vinegar and baking soda – Natural deodorizers and grease-cutting agents.
- Tile cleaner or mild detergent – Removes stubborn stains without damaging tiles.
- Steam mop (optional) – A deep-cleaning tool that eliminates bacteria.
- Grout cleaner – Keeps grout lines bright and prevents mold buildup.
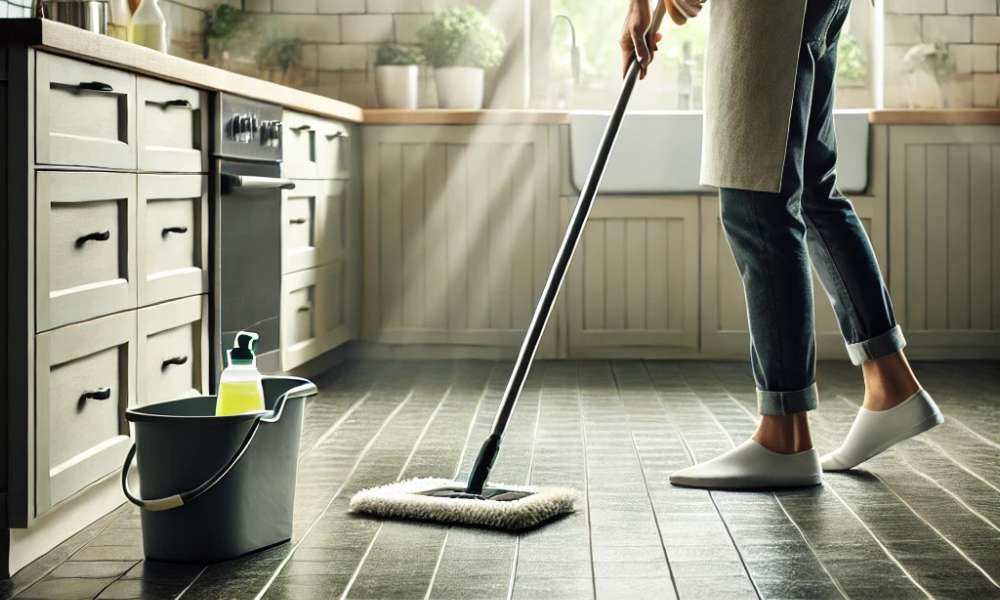
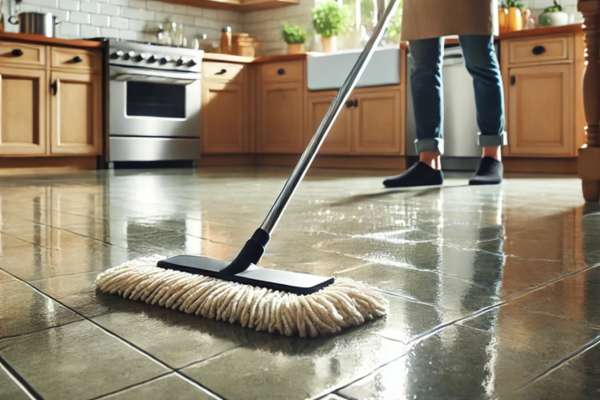
4. Step-by-Step Guide: How to Clean Kitchen Floor Tiles
Sweep or Vacuum: Begin by removing loose dirt, crumbs, and dust. Even small particles can turn abrasive underfoot, scratching tile surfaces or grinding into grout.
Prepare a Cleaning Solution: Opt for a store-bought or homemade vinegar solution. Mix warm water, a splash of vinegar, and a drop of dish soap for a balanced blend that tackles grime.
Mop the Floor Gently: Use gentle strokes to avoid pushing dirt further into grout lines. Rinse and wring the mop often, ensuring you’re not just redistributing contaminated water.
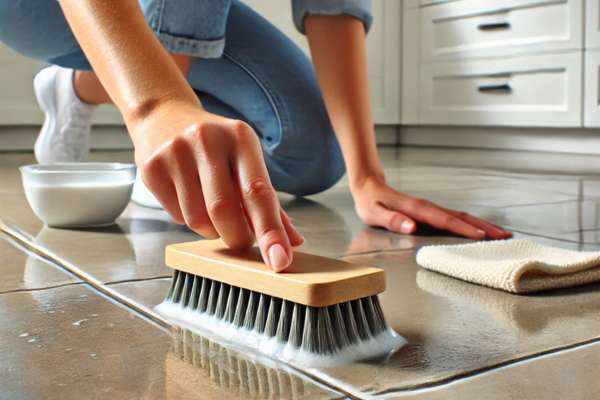
Spot Clean Stubborn Stains: Sprinkle baking soda or apply hydrogen peroxide on stained spots. Let it fizz and penetrate for a few minutes before wiping away the paste.
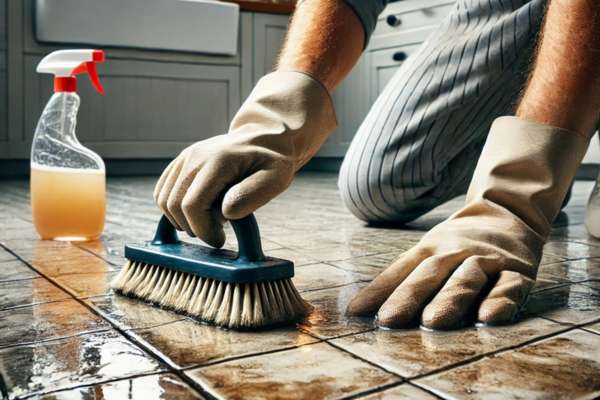
Deep Clean the Grout Lines: Employ a dedicated scrub brush for thorough tile grout cleaning. Pay attention to corners and edges where dirt settles unnoticed.
Rinse Thoroughly:After scrubbing, rinse the floor to clear away any chemical residues. Lingering residue can lead to a cloudy or sticky finish.
Dry the Floor:Conclude by wiping the tiles with a clean microfiber cloth. This prevents water spots and helps maintain a polished shine.
4. Removing Tough Grease and Stains
Grease removal from tiles can prove tricky, especially near cooking stations. Dish soap combined with warm water dissolves stubborn oil films. For heavily crusted patches, hydrogen peroxide or baking soda creates a potent blend that lifts residue upon gentle scrubbing. If stains seem unyielding, consider the power of steam cleaning; it can penetrate deep layers of gunk without employing harsh chemicals. Steam’s heat dislodges congealed fats, making grease vanish like vapor. This method is especially helpful if you frequently prepare fried foods, where droplets of cooking oil can settle into pores of the tile.
5. Deep Cleaning Tile Grout for a Sparkling Kitchen Floor
Grout, a porous material filling the gaps between tiles, is highly prone to discoloration. Each speck of dust or spill that seeps in may fester, causing dull or dark lines. Baking soda mixed with vinegar creates an effervescent reaction that loosens soil and lifts it to the surface. If convenience is paramount, store-bought grout cleaners offer quick, straightforward solutions. However, using these products sparingly is wise, lest you cause chemical damage or reduce the grout’s lifespan. After a thorough tile grout cleaning session, applying a grout sealer can form a protective barrier. This sealer keeps moisture and stains at bay, prolonging the pristine appearance of the floor.
6. Homemade and Eco-Friendly Tile Cleaning Solutions
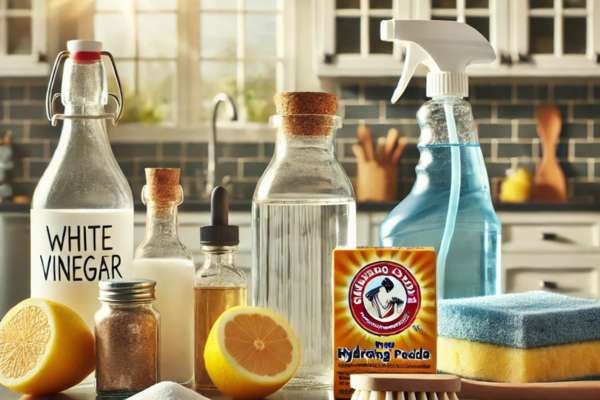
Chemical-heavy products, while efficient, may introduce fumes or irritants into your home. Eco-friendly tile cleaning solutions offer an alternative—gentle on both the environment and your respiratory system. A classic vinegar and water solution, used in moderation, dissolves light grease and stains. Baking soda paste, made by blending baking soda with a small amount of water, addresses deeper blemishes. Hydrogen peroxide, another household staple, brightens and disinfects without leaving behind a pungent smell. Lemon juice, known for its citric acid content, functions as a natural degreaser, bringing a refreshing fragrance that lingers long after you’ve finished. Through these safe, homemade tile cleaner recipes, you can avoid hazardous residues while preserving tile surfaces.
7. Common Mistakes to Avoid While Cleaning Kitchen Floor Tiles
Excess zeal can unwittingly lead to damage. Harsh chemicals—like undiluted bleach or abrasive powders—might erode protective finishes, causing tile surfaces to look dull. Overzealous scrubbing, especially with rough brushes or scouring pads, leaves micro-scratches that attract even more grime over time. Failing to address grout cleaning allows discoloration to accumulate, diminishing the vibrancy of the floor. Another frequent misstep involves letting puddles remain after mopping; standing water can seep into cracks or corners, fostering mold growth and tile warping. Moderation in cleaning frequency, technique, and product choice prevents these undesired outcomes.
8. Tile Floor Maintenance Tips for Long-Lasting Shine
Small routines performed regularly yield big results. Adopting a weekly light cleanse stops spills from becoming stubborn stains. A monthly deeper cleaning session or a thorough approach every few weeks preserves both grout and tile brightness. Placing doormats at entrances prevents gritty debris from being tracked inside, while swiftly wiping away spills halts the formation of sticky spots. Sealing the grout periodically prevents moisture infiltration and curtails the development of bacteria. Moreover, rotating cleaning products occasionally can thwart any chemical buildup. With consistent tile floor maintenance, you can confidently entertain guests, cook meals, and tread across your kitchen knowing your surfaces are safe and sanitary.
Conclusion
Embarking on the quest to discover how to clean kitchen floor tiles effectively paves the way to a dazzling, hygienic cooking environment. Simple routines—like regular sweeping, using the correct cleaning solutions, and addressing grout proactively—shield floors from long-term damage. A routine that includes eco-friendly tile cleaning solutions enhances both your well-being and the planet’s. Clean tiles remain a cornerstone of a tidy kitchen, instilling confidence that each dish prepared comes from a space free of hidden germs and lingering dirt.