
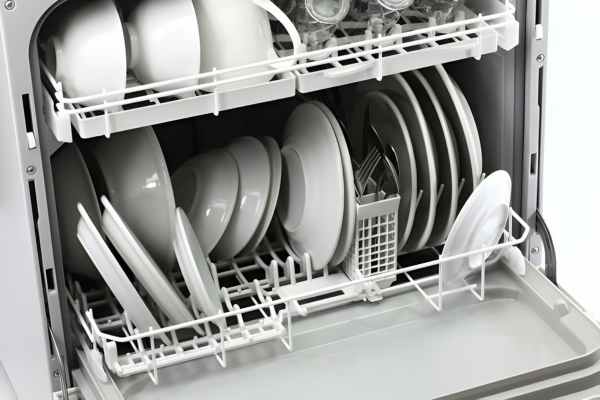
Imagine the convenience of having sparkling clean dishes effortlessly gliding out of your Whirlpool dishwasher filter after each cycle. While this modern marvel handles the dirty work for you, its efficiency can be compromised if neglected maintenance becomes an issue. One often overlooked yet vital component is the dishwasher filter – a small but mighty guardian against debris and grime that can impede performance. In this guide, we will delve into the intricate world of Whirlpool dishwashers and unveil the secrets to keeping your filter pristine, ensuring your dishes emerge spotless every time.
How often clean Whirlpool dishwasher filter?
It is recommended to clean the filter in your Whirlpool dishwasher every 2-3 months to ensure optimal performance and prevent clogs. Regular cleaning of the filter helps maintain the efficiency of the dishwasher and ensures that dishes come out clean after each cycle. To clean the filter, simply remove it from the dishwasher, rinse it under running water to remove any debris or food particles, and then reinsert it back into the dishwasher.
Additionally, if you notice any signs of residue or buildup on your dishes, it may be a sign that the filter needs to be cleaned more frequently. Keeping the filter clean will not only improve the cleanliness of your dishes but also extend the lifespan of your dishwasher. Remember to refer to your Whirlpool dishwasher manual for specific instructions on how to properly clean and maintain your appliance.
How do I clean the vents on my Whirlpool dishwasher?
Cleaning the vents on your Whirlpool dishwasher is important to ensure optimal performance and prevent any potential issues. To clean the vents, start by unplugging the dishwasher from the power source to ensure safety. Next, remove the bottom panel of the dishwasher to access the vents. Use a vacuum cleaner with a brush attachment to remove any dust, debris, or food particles that may have accumulated in the vents.
After vacuuming, you can also use a damp cloth or sponge with mild detergent to wipe down the vents and remove any remaining dirt or grease. Be sure to thoroughly dry the vents before reassembling the bottom panel and plugging the dishwasher back in. Regularly cleaning the vents of your Whirlpool dishwasher will help maintain its efficiency and prolong its lifespan.
Factor to consider How To Clean A Whirlpool Dishwasher Filter
Filter Type and Location
First up, know your filter type and where it’s located in your dishwasher. Whirlpool dishwashers can have different filter designs, some being self-cleaning while others require manual cleaning. Understanding this will guide you on how to approach the cleaning process.
Cleaning Frequency
How often you need to clean your filter largely depends on how frequently you use your dishwasher and the types of dishes you’re washing. If you rinse your dishes before loading, you might clean the filter less often than if you don’t. A good rule of thumb is to check and clean the filter every month or so.
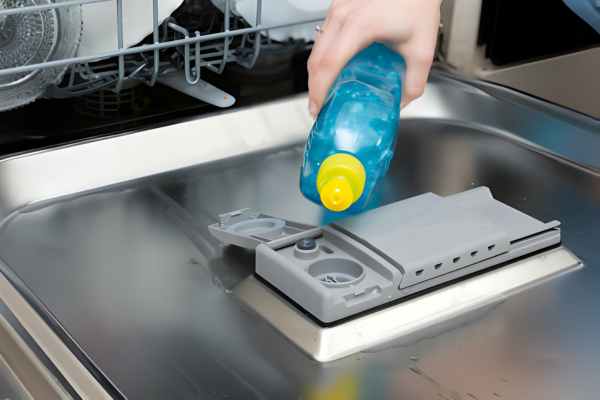
Cleaning Agents
While many people swear by vinegar and baking soda for cleaning dishwasher filters, it’s important to consider the manufacturer’s recommendations. Some filters might require mild soap and water, while others can handle more robust cleaning agents. Always avoid harsh chemicals that could damage the filter or the dishwasher’s interior.
Drying Before Reinstallation
After cleaning, ensure the filter is thoroughly dried before putting it back. This prevents mold and mildew growth, which could lead to unpleasant odors or even health issues.
Inspection for Damage
Each time you clean, inspect the filter for any signs of wear or damage. A compromised filter won’t work as efficiently, potentially leading to food particles remaining on dishes or harming the dishwasher’s pump system. If you notice any damage, it’s time for a replacement.
Here Are Some Ideas How To Clean A Whirlpool Dishwasher Filter
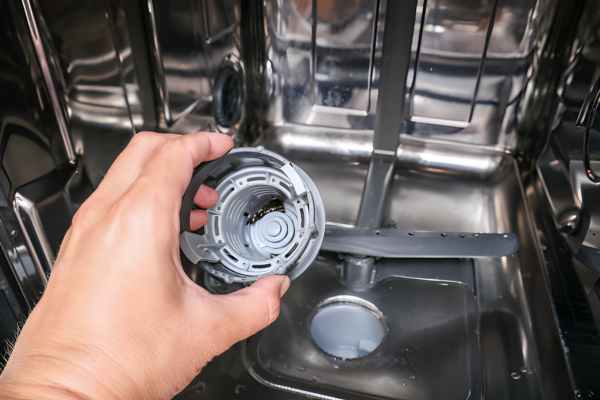
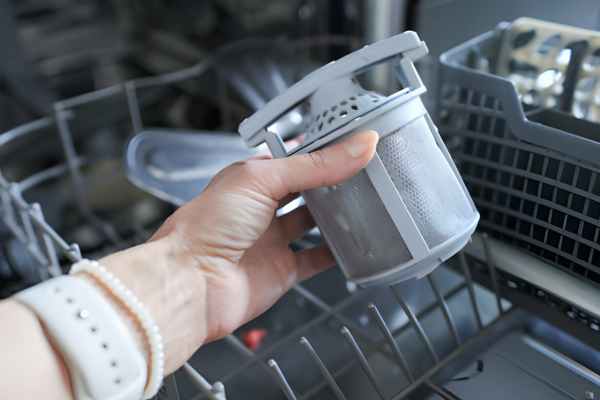
Locate and Remove the Filter

As you navigate the inner workings of your Whirlpool dishwasher, locating and removing the filter may seem like a daunting task. However, with a few simple steps, this crucial maintenance process can become second nature. Begin by consulting your dishwasher manual to identify the exact location of the filter. Once located, gently remove the filter and inspect it for any debris or blockages that may be hindering its performance. Cleaning the Whirlpool dishwasher filter is essential for maintaining optimal functionality and ensuring sparkling clean dishes after every cycle. By regularly checking and cleaning the filter, you can prevent clogs and buildup that may lead to inefficient cleaning results.
Rinse Under Running Water
Rinsing under running water is a crucial step in maintaining the cleanliness and efficiency of a Whirlpool dishwasher filter. By thoroughly rinsing the filter under running water, you can effectively remove any food particles, debris, or residue that may have accumulated. This simple yet essential task helps to prevent clogs, odors, and overall performance issues with your dishwasher. Moreover, rinsing under running water allows for a more thorough cleaning compared to simply wiping the filter with a cloth. The force of the water helps to dislodge stubborn particles and ensure that the filter is properly cleaned.
Soft Brush Scrub

Soft brush scrubbing is a gentle yet effective way to clean hard-to-reach areas, such as the filter in a Whirlpool dishwasher. The soft bristles of the brush can easily dislodge food particles and debris without causing any damage to the delicate parts of the appliance. This method ensures thorough cleaning and helps maintain optimal dishwasher performance. When using a soft brush scrub, it’s important to be patient and thorough, making sure to reach all corners and crevices of the filter. By incorporating this technique into your regular cleaning routine, you can prevent clogs and ensure that your dishwasher runs smoothly for years to come.
Soak in Soapy Water
Soaking in soapy water is a simple yet effective way to clean a whirlpool dishwasher filter. The combination of warm water and dish soap helps to break down and dissolve grease, grime, and food particles that may be lingering in the filter. By allowing the filter to soak for a period of time, you are giving the soap solution the opportunity to work its magic and loosen any stubborn dirt. One key tip when soaking your whirlpool dishwasher filter is to ensure that it is completely submerged in the soapy water. This allows for an even distribution of cleaning power and ensures that all parts of the filter are being effectively cleaned.
Baking Soda for Tough Stains
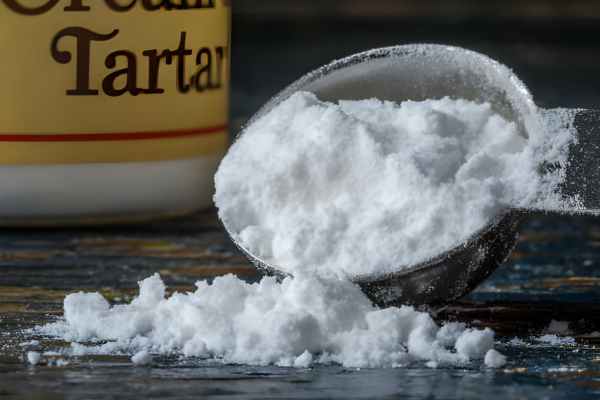
Baking soda is a versatile household staple that can work wonders when it comes to tackling tough stains. One surprising application of baking soda is its effectiveness in cleaning the filter of a Whirlpool dishwasher. By creating a paste with water and baking soda, you can gently scrub away any grime or build-up that may be clogging the filter, leading to better performance and cleaner dishes. Not only does baking soda serve as an excellent cleaning agent for tough stains, but it also helps eliminate odors and leaves a fresh scent behind. This natural solution is not only cost-effective but also environmentally friendly, making it a safe and efficient choice for maintaining your dishwasher’s cleanliness.
Vinegar Soak for Odors
One effective way to combat stubborn odors in your dishwasher is by using a vinegar soak. Vinegar is known for its natural cleaning properties and ability to eliminate foul smells effectively. To do this, simply fill a bowl with white vinegar and place it on the top rack of your dishwasher. Run a hot water cycle without detergent and let the vinegar work its magic in breaking down odor-causing bacteria. Another approach is to remove the dishwasher filter and soak it in a solution of vinegar and water. This will help remove any trapped food particles or residue that may be contributing to the unpleasant smell. Regularly cleaning the filter with vinegar can also help prevent future odors from developing, keeping your dishwasher smelling fresh and clean.
Rinse Thoroughly After Cleaning

Cleaning your frigidaire dishwasher filter is a crucial task to ensure your dishes come out sparkling clean every time. However, one common mistake many people make is not rinsing the filter thoroughly after cleaning. Simply giving it a quick rinse may leave behind residue and gunk that can diminish the effectiveness of your dishwasher. To truly ensure that your filter is clean and free from any buildup, take the extra time to thoroughly rinse it under running water. Use a gentle scrub brush or old toothbrush to remove any stubborn debris that may be lingering in the nooks and crannies. By taking this extra step in the cleaning process, you’ll prolong the life of your dishwasher and keep it performing at its best for years to come.
Dry Before Reinstalling

Reinstalling a Whirlpool dishwasher filter, it is crucial to ensure that it is completely dry. Even the slightest amount of moisture left behind can lead to mold growth and unpleasant odors in your appliance. To prevent this, take the time to thoroughly air-dry the filter after cleaning it. Placing it in direct sunlight or using a fan can help speed up this process. Allowing the filter to dry completely before reinstalling also ensures optimal performance of your dishwasher. A damp filter can trap debris and impede water flow, resulting in dishes that are not cleaned effectively.
Check for Damage
Checking for damage in your Whirlpool dishwasher, pay close attention to the dishwasher filter. A common issue is a clogged or damaged filter, which can lead to poor cleaning performance. To clean the filter, remove it from the dishwasher and rinse it under warm water to remove any debris or food particles. Inspect the filter for any tears or signs of wear, as a damaged filter will need to be replace promptly to avoid further issues.
In addition to the filter, check for leaks around the dishwasher door and underneath the unit. Leaks can indicate a problem with the door seal or plumbing connections. Addressing leaks early can prevent water damage to your floors and cabinets. Finally, inspect the spray arms for any blockages or buildup that could affect water flow during the wash cycle.
Reassemble Correctly
As you reassemble the components of your Whirlpool dishwasher after cleaning, it’s crucial to ensure they are put back together correctly to guarantee optimal performance. One key component that often gets overlooked is the dishwasher filter – a small but vital part responsible for trapping food particles and debris during the wash cycle. When reassembling the filter, be sure to check for any signs of wear or damage, as a malfunctioning filter can lead to poor washing results and potential leaks.
Taking the time to carefully reassemble your Whirlpool dishwasher can help extend its lifespan and prevent costly repairs in the future. Pay close attention to the placement and alignment of each component as you put them back together, following the manufacturer’s instructions if necessary. By treating this task with diligence and precision, you’ll not only maintain your dishwasher’s efficiency but also ensure that it continues to deliver sparkling clean dishes with every use.
The Final Thought
Learning how to clean a Whirlpool dishwasher filter is a simple yet essential maintenance task that can help ensure the efficiency and longevity of your appliance. By regularly removing and cleaning the filter, you can prevent clogs, odors, and poor washing performance. Following the steps outlined in this article will not only improve the cleanliness of your dishes but also contribute to the overall health of your dishwasher. Take the time to incorporate filter cleaning into your regular cleaning routine to keep your Whirlpool dishwasher running smoothly for years to come.