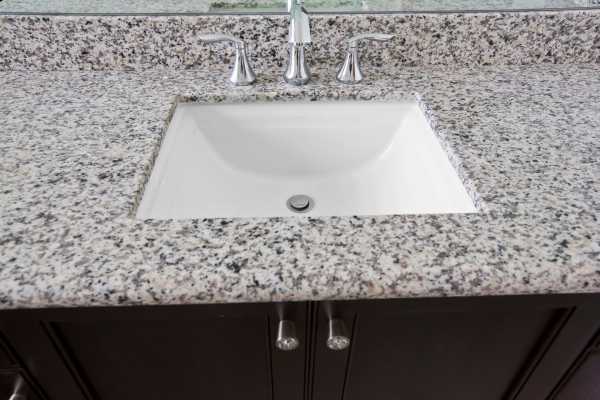
Struggling with an undermount sink held stubbornly in place by epoxy? Whether you’re tackling a renovation project or fixing a broken seal, learning how to remove epoxy from undermount sink can save time and money. This process requires precision, the right tools, and careful techniques to avoid damaging your sink or countertop. In this article, we’ll walk you through a step-by-step guide to safely and efficiently remove epoxy adhesive. From preparing your workspace to ensuring a clean finish, we’ve got everything you need to know. Read on to discover practical tips that make this daunting task easier and hassle-free!
Understanding the Role of Epoxy in Undermount Sinks

Epoxy plays a crucial role in ensuring the durability and stability of undermount sinks. This adhesive acts as a secure bond between the sink and the countertop, keeping the sink firmly in place even under constant use. Its strength and water-resistant properties make it ideal for areas exposed to moisture, such as kitchens and bathrooms. Additionally, epoxy provides a seamless appearance, enhancing the aesthetic appeal by eliminating visible brackets or screws. Without it, undermount sinks may loosen or detach over time, leading to costly repairs. Understanding its importance helps homeowners maintain their sinks effectively and take appropriate steps when repairs or replacements are necessary.
Tools and Materials You’ll Need for Epoxy Removal
To successfully tackle epoxy removal from an undermount sink, having the right tools and materials is essential. Start with a heat gun to soften the adhesive and a utility knife or scraper for careful removal. A solvent like acetone or epoxy remover will help break down stubborn residue. Safety gear, including gloves, goggles, and a mask, ensures protection from chemicals and sharp tools. Use a putty knife for precision and a clean cloth for wiping away residue. For tougher spots, sandpaper or a small rotary tool may be necessary. Gathering these items beforehand ensures a smoother, more efficient process, minimizing damage to your sink and surrounding areas.
Safety Precautions Before Starting the Process
Before tackling epoxy removal, prioritizing safety is crucial to protect yourself and your surroundings. Always wear protective gear, including safety goggles, gloves, and a mask, to shield against fumes, sharp tools, and potential splatters. Ensure your workspace is well-ventilated to minimize inhalation of harmful chemicals. Secure the area around the sink, covering nearby surfaces with drop cloths or plastic sheets to prevent accidental damage. Keep a fire extinguisher nearby when working with heat sources. Follow the manufacturer’s instructions for any solvents or adhesives used, and avoid mixing chemicals. Finally, double-check that all tools are in good condition, as dull or faulty equipment can lead to accidents. Safety first ensures a smooth and worry-free process.
Preparing the Workspace for Epoxy Removal

Before starting the epoxy removal process, it’s essential to prepare your workspace to avoid potential damage to your sink and countertop. Begin by clearing the area of any items that may obstruct your work or be accidentally damaged. Use a thick plastic sheet or protective padding to cover the surrounding surfaces, ensuring they remain scratch-free during the process. Mask off edges with painter’s tape to prevent accidental spills or tool marks. Have a bucket and cleaning supplies ready to catch debris or solvent drips. Proper preparation not only protects your workspace but also ensures a smoother and more efficient epoxy removal process, minimizing the risk of costly repairs or replacements.
Assessing the Strength and Condition of the Epoxy Bond
Before removing epoxy from an undermount sink, assessing the strength and condition of the bond is crucial. Start by examining the adhesive to understand its thickness, age, and overall integrity. A well-cured epoxy bond may require more effort to loosen, especially if it has been in place for years. Gently test the edges by applying slight pressure to identify weak points. Consider whether the epoxy has degraded over time due to heat, moisture, or chemical exposure, which can make removal easier. For tougher bonds, additional methods like heat application or solvents may be necessary. Proper assessment ensures you use the right tools and techniques, avoiding unnecessary damage to the sink or countertop.
Using Heat to Soften the Epoxy Bond

Applying heat is a proven method to soften epoxy bonds, making them easier to remove without causing damage to your sink or countertop. Begin by using a heat gun or hair dryer, setting it to a moderate temperature to avoid overheating the area. Move the heat source in a consistent, sweeping motion across the epoxy to evenly distribute warmth. This softens the adhesive, reducing its grip on the surfaces. Avoid prolonged heat exposure, as excessive temperatures can harm the sink material. Once the epoxy is pliable, use a plastic scraper or putty knife to gently lift it away. This method is both safe and effective when performed with proper care and patience.
Applying a Solvent to Break Down Epoxy Adhesive
When dealing with stubborn epoxy adhesive, applying a solvent is an effective way to break it down without damaging your sink or countertop. Solvents like acetone, isopropyl alcohol, or commercial epoxy removers are commonly recommended for this task. Begin by ensuring the area is well-ventilated and protected with gloves and safety goggles. Apply the solvent generously to the epoxy using a clean cloth or brush, allowing it to sit for several minutes to soften the adhesive. Once the epoxy begins to break down, gently scrape it away using a plastic scraper or putty knife. Repeat as needed until the surface is clean, then wipe away residue with a damp cloth.
Scraping Off the Epoxy Without Damaging Surfaces

Removing epoxy from an undermount sink without causing damage requires a careful approach and the right tools. Start by selecting a plastic scraper or a putty knife, as these are less likely to scratch the surface. Gently work the tool under the softened epoxy, applying consistent pressure to lift the adhesive. For stubborn areas, consider using a heat gun to loosen the bond before scraping. Avoid metal tools that can chip or damage the sink or countertop. Patience is key—scrape in small sections to maintain control and precision. Once the majority of the epoxy is removed, clean the area with a mild solvent to eliminate any residue for a smooth finish.
Dealing with Stubborn Epoxy Residue
Removing stubborn remove epoxy from undermount sink residue requires patience and the right approach to ensure a clean finish. After scraping off the majority of the adhesive, apply a solvent specifically designed to break down epoxy, such as acetone or a commercial epoxy remover. Allow the solvent to sit for a few minutes to loosen the residue. Use a plastic scraper or a non-abrasive sponge to gently lift the softened epoxy without damaging the surface. For particularly tough spots, try using fine-grit sandpaper or a heat gun to soften the residue further. Always clean the area thoroughly with warm soapy water after removal to prevent chemical buildup and ensure a polished, residue-free surface.
Cleaning and Inspecting the Sink Area After Removal
After successfully removing the epoxy, thorough cleaning of the sink area is crucial to prepare it for reinstallation. Begin by wiping down the surface with a damp microfiber cloth to remove loose debris and residue. Use a mild cleaning solution or a mixture of warm water and dish soap to scrub the area gently. For stubborn adhesive remnants, a soft-bristle brush or non-abrasive sponge works effectively without scratching the surface. Pay close attention to corners and edges, ensuring no adhesive is left behind. Once cleaned, dry the sink area completely and inspect it closely for any remaining epoxy or damage, addressing these issues before moving forward with the next steps.
Reinstalling the Undermount Sink Securely

Reinstalling an remove epoxy from undermount sink requires precision and the right approach to ensure durability and stability. Start by thoroughly cleaning the sink and countertop surfaces to remove any leftover adhesive or debris. Use a high-quality adhesive specifically designed for undermount sinks, ensuring a strong, water-resistant bond. Apply the adhesive evenly along the sink rim before positioning it carefully under the countertop. Secure the sink with proper brackets or clamps while the adhesive sets, typically for 24 hours. Check for alignment to avoid leaks or uneven placement. After the adhesive cures, test for stability by lightly pressing around the edges. Following these best practices ensures a professional, long-lasting installation.
conclusion
mastering how to remove epoxy from undermount sink can make sink repairs and replacements much more manageable. By using the right tools, following safety precautions, and carefully applying removal techniques like heat or solvents, you can successfully eliminate even the most stubborn epoxy. Remember to thoroughly clean the area and inspect for any residue before reinstalling the sink with fresh adhesive. Proper maintenance after installation will ensure your undermount sink remains secure and functional for years. Whether you’re tackling a DIY project or assisting a professional, these steps provide a reliable framework. Follow this guide, and you’ll achieve a flawless finish while protecting your countertop investment.
