
Air conditioning units are a staple in modern-day homes, their cooling breeze a welcome respite throughout sweltering summers. Yet, there lies a diffused but critical aspect regularly ignored: drainage. Without right drainage, the consistent accumulation of condensation on your AC unit can result in unwanted water damage. One simple but imaginitive answer? Connect Ac Drain To Sink. Not best does this keep your system strolling correctly, however it also prevents those traumatic leaks. In this guide, we’ll discover each step meticulously, from the equipment you’ll want to efficiently connecting the watercourse. Even in case you’re a newbie, that is a DIY task nicely inside attain.
Understanding AC Drainage Systems

An air con unit is more than simply cool air; it additionally dehumidifies. As it pulls moisture from the air, that moisture condenses into water droplets, which need an outlet. The AC watercourse line is the unsung hero right here, ushering the water thoroughly away from the machine. Without this humble pipe, condensation would increase, ultimately soaking the internal components of the AC. Left unchecked, such moisture may want to result in electric problems, mildew growth, and severe harm on your unit. Therefore, a properly connected drain line ensures toughness, protective each your AC and home from water-related catastrophes.
Benefits of Connecting the AC Drain to a Sink
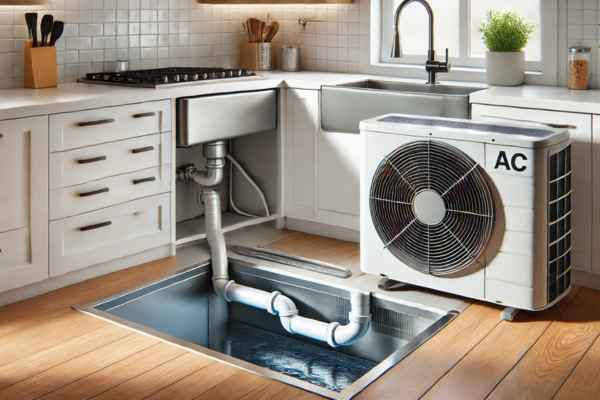
Why the sink, you ask? A sink gives an convenient, dependable drainage solution, a space that’s already committed to water disposal. By linking the AC watercourse to it, you’re decreasing the opportunity of leaks—no more buckets under the unit catching drips or mysterious puddles to mop up. Maintenance becomes a breeze, too. With the drain line without difficulty available, normal inspections for clogs or wear and tear can be done without fuss. An unobstructed watercourse boosts performance, stopping any backflow that could stall your device. In essence, it’s about defensive your home from water harm while making sure your AC operates at height performance.
Essential Tools and Materials Needed
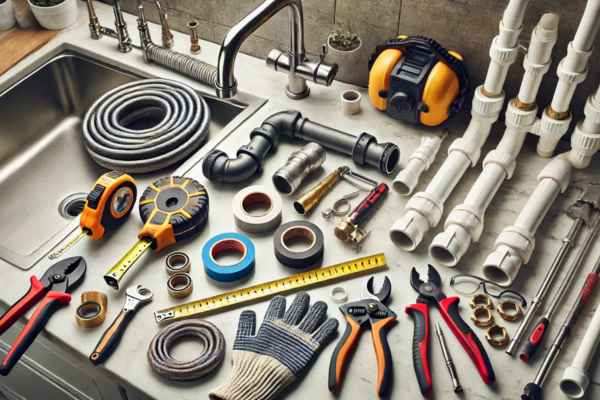
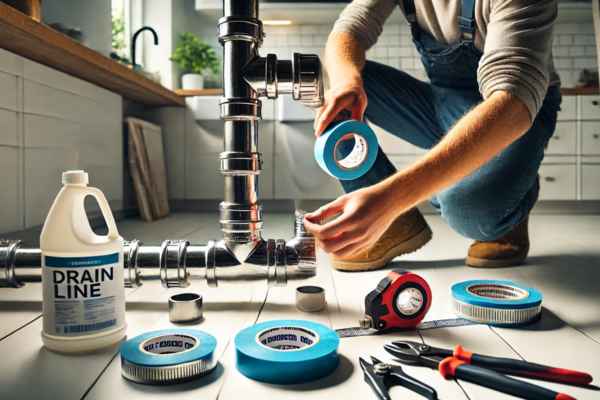
You don’t need to be a pro plumber to tackle this assignment, but you’ll want the proper gear. Gather a PVC pipe cutter for precision trimming, a reliable measuring tape, a flexible watercourse hose, and, of course, plumber’s tape for sealing those essential connections. Fittings, depending in your sink’s setup, are a ought to, and don’t forget an adjustable wrench for tightening the whole thing into location. Safety goggles and gloves are encouraged, due to the fact protection must continually be prioritized. Optional but useful: a hand vacuum to clean out any particles from the drain line earlier than you begin, ensuring a continuing connection.
Preparing the Area for Installation

Before diving into the installation, you’ll need to prepare your paintings location. First matters first: flip off the AC unit on the breaker field—operating on an energetic device is a threat you don’t want to take. Then, clean the vicinity underneath the sink. Inspect it intently. Are there present plumbing lines in the manner? Any leaks you want to address ahead? Once the whole lot is in take a look at, remove any obstructions and prepare your workspace. Cleanliness counts; a muddle-unfastened, smooth surroundings will make the set up cross an awful lot smoother, casting off the chance of accidentally unfavorable different additives.
How to Locate the AC Drain Line

Tracking down the AC watercourse line may be a piece of a puzzle for first-timers. The drain line is typically a slender PVC pipe that extends from the unit, usually close to its base in which water collects. For significant AC structures, the watercourse line usually runs along the aspect of your home and exits near the muse. Window devices, then again, frequently have their drain at the returned or alongside the aspect. Older structures may present a bit extra of a undertaking, but your great guess is to check the user guide or consult an expert for steering. Once you find the watercourse line, you’re geared up to move forward.
How to Cut and Measure the Drain Line
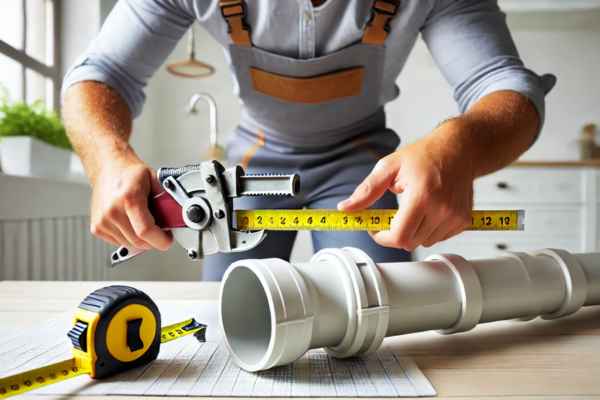
The subsequent essential step is making sure the watercourse line is the proper duration. Grab your measuring tape and determine how a lot of the line you’ll need to cut to attain the sink’s drain. Precision here is prime. The pipe need to be lengthy enough to allow easy water float but now not so long that it sags, that could block the drainage. Using a PVC pipe cutter, make a smooth, clean reduce. Any tough edges or splinters may want to lead to imperfect connections, increasing the chance of leaks. Always double-check your measurements before cutting—degree two times, reduce once, as the old adage goes.
Choosing the Right Sink Connection

The form of sink connections may be overwhelming, however it’s important to pick the proper one for a secure fit. Typically, you’ll come across slip-joint and threaded connections. Slip-joint connections are consumer-pleasant and adjustable, making them perfect for beginners. If you prefer a stronger option, go together with threaded connections, which offer a tighter, more long lasting seal. Before buying any fittings, verify that they’re like minded along with your sink’s plumbing and the AC drain pipe. Compatibility is the cornerstone of a leak-unfastened installation, and double-checking will prevent from unwanted return journeys to the hardware keep.
Attaching the AC Drain Line to the Sink
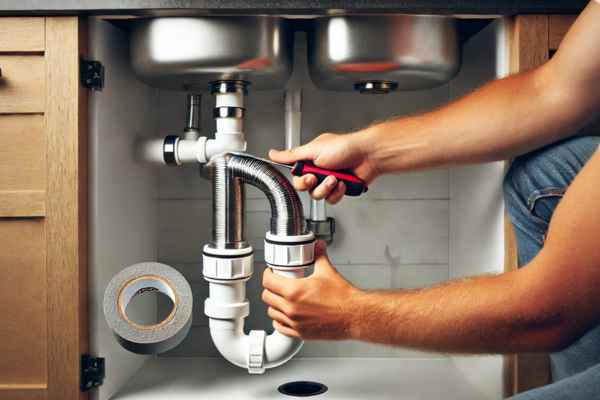
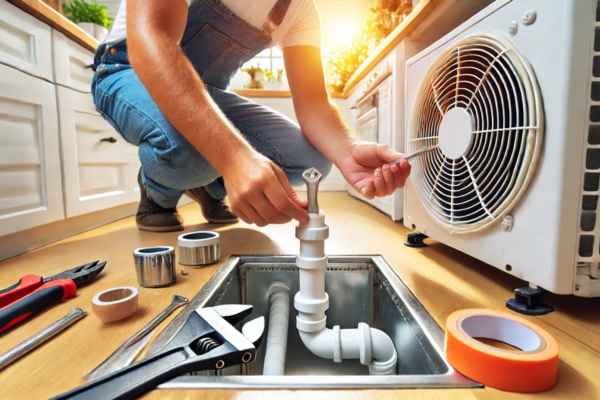
Now, it’s time to connect the AC watercourse line to the sink. Begin via attaching the flexible drain hose to the AC’s drain pipe. Use plumber’s tape across the threads to steady the connection tightly. Next, manual the opposite quit of the hose to the sink’s drain inlet. Ensure the hose slopes downward—gravity will deal with the rest, pulling the condensation into the sink. Tighten all connections, taking care now not to over-tighten and crack the fittings. A consistent, stable connection will save you leaks and maintain your AC strolling easily.
Sealing and Securing the Drain Connection
To keep away from any sneaky leaks, seal the joints with both plumber’s tape or PVC glue, depending on the connection kind. Apply the sealant flippantly, ensuring no gaps are left wherein water should get away. Once the connections are sealed, supply them a piece of time to set. While ready, recall securing the drain hose with brackets or clamps to prevent shifting. This extra step will improve your installation, preserving the watercourse line consistent and steady, even during excessive-usage periods. Securing the line may seem minor, however it’s a protracted-term shield against destiny troubles.
Testing the Connection for Leaks
With the whole lot in location, it’s time for the instant of reality: checking out the connection. Switch the AC unit again on and permit it to run for 15 to half-hour. Watch intently. Any drips or puddles forming around the sink or fittings? If so, flip the unit off and retighten the fittings. You may want to feature greater plumber’s tape or glue if vital. Once you’re assured there aren’t any leaks, you can breathe a sigh of remedy, understanding the task become done well. A successful test confirms your device is ready to handle even the most humid of days.
Maintenance Tips for Your AC Drain Connection
Like any system, your AC drain connection calls for occasional maintenance to preserve it in height situation. Regularly look into the watercourse line for any blockages or particles that would purpose a clog. Cleaning the road with a moderate cleansing solution or the use of a vacuum pump can prevent such troubles. After heavy utilization, or as soon as a season, test the connections for any put on or leaks. These preventative steps will help avoid large issues and ensure that your AC runs easily, maintaining your private home cool and dry for future years.
Common Mistakes to Avoid
Mistakes can appear, but being aware of commonplace pitfalls can save you from frustration. One primary mistakes is reducing the watercourse line too brief or allowing it to sag, each of which can impede right drainage. Another common mistake is neglecting to seal connections properly, main to unwanted leaks. Lastly, no longer retaining a steady downward slope for the drain hose may want to reason water to again up into the machine, affecting overall performance. By taking some time and double-checking every step, you’ll keep away from those troubles and revel in a unbroken set up.
Conclusion
Connecting your AC drain to a sink isn’t simply a sensible answer—it’s a vital one. Proper drainage protects your air con system from moisture damage, making sure it operates at complete capability for years yet to come. With this manual, you’ve learned a way to measure, reduce, and join the watercourse line without problems. Regular maintenance, easy exams, and making sure a stable suit will hold your setup functioning effectively. Take delight to your accomplishment—you’ve no longer handiest covered your AC system however also safeguarded your own home from potential water harm.