
Vinyl flooring is a popular choice in modern kitchens for a reason—it’s durable, water-resistant, and surprisingly stylish. But just like any surface under constant foot traffic, crumbs, and culinary chaos, it requires regular attention. Knowing how to clean kitchen floor vinyl not only keeps your space hygienic but also extends the life and luster of your floors. Whether you’re tackling a post-dinner disaster or just keeping up appearances, this guide has you covered.
Why Cleaning Your Kitchen Vinyl Floor Matters
A clean kitchen is more than just visually pleasing—it’s essential for your health. Spills, crumbs, and grease can harbor bacteria and create slip hazards. Vinyl, though low-maintenance, can lose its shine or develop stubborn stains if neglected. Dirt and grit, when left unchecked, can grind into the surface over time, dulling its finish. Clean floors also elevate your home’s overall atmosphere, creating a fresh, inviting space to cook, eat, and gather.
Understanding Vinyl Flooring in the Kitchen
Vinyl flooring is crafted from synthetic materials that mimic the look of natural stone or wood without the high-maintenance demands. It’s available in sheets, tiles, or planks and often includes a protective top layer known as a wear layer. This makes it resistant to scratches and stains, but not invincible. Excess water, harsh chemicals, and abrasive tools can break down that surface. Understanding your flooring type helps you tailor your cleaning approach without risking damage.
Tools and Products You Need to Clean Kitchen Floor Vinyl
Before diving in, gather the right tools. For daily and weekly cleaning, you’ll need:
- A soft-bristle broom or microfiber dust mop
- A gentle pH-neutral cleaner (specially formulated for vinyl)
- A spray bottle with a vinegar-water mix for DIY enthusiasts
- A non-abrasive sponge or microfiber cloth
- A damp mop with a soft head—preferably sponge or microfiber
- A bucket with warm (not hot) water
Avoid anything with ammonia, bleach, or wax. These can strip away the finish or leave a cloudy residue.
How to Clean Kitchen Floor Vinyl Daily with Ease
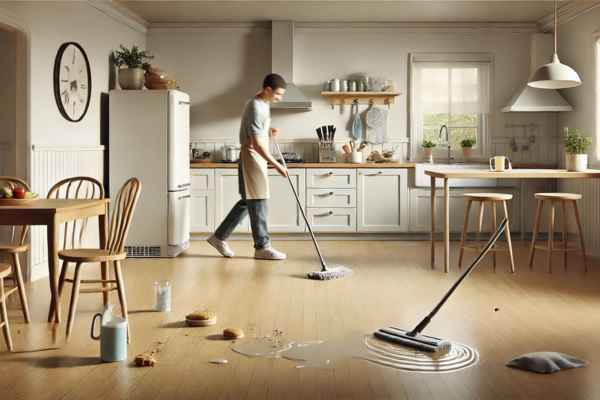
Daily cleaning doesn’t need to be labor-intensive. Start by sweeping or dry mopping to remove surface dust, crumbs, and grit. Spot-clean spills as they happen using a damp cloth and a diluted vinyl-safe cleaner. For greasy spots, a dash of dish soap in warm water works wonders. Dry the area with a soft towel to prevent water from seeping into seams or edges.
Weekly Cleaning Routine for a Spotless Vinyl Floor

Once a week, give your floor a more thorough refresh. Vacuum using a hard floor setting or gently mop with a damp (not soaking) mop. Spray your cleaner across sections of the floor and wipe in an S-pattern for maximum coverage. Rinse the mop frequently in clean water. This prevents residue buildup that could dull your floor’s finish. Always dry the surface after mopping to preserve its integrity.
Deep Cleaning Vinyl Kitchen Floors the Right Way

Every few months—or when you notice grime buildup—a deep clean becomes essential. Begin with a sweep and vacuum. Then, use a specialized vinyl floor cleaner or a homemade mix of white vinegar and warm water (1 cup vinegar per gallon of water). Use a soft mop and work in sections, giving a little extra attention to scuffed or sticky areas. For embedded grime, use a soft-bristle brush in a circular motion. Rinse with clean water and dry immediately.
Removing Stains from Vinyl Floors Without Damage
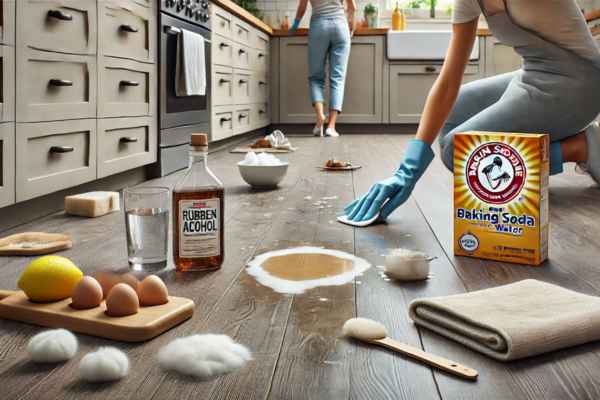
Vinyl is resilient, but stains can still set in. For food stains, try a paste of baking soda and water—apply gently with a soft cloth. For ink or dye, rubbing alcohol dabbed onto a cotton ball can lift the color without harming the floor. Never scrub aggressively. Always test solutions in a hidden area before full application.
Avoiding Common Mistakes When Cleaning Vinyl Floors
Many well-meaning homeowners make small missteps that reduce the lifespan of their vinyl flooring. Avoid:
- Using steam mops – The high heat can warp or bubble vinyl.
- Over-wetting the floor – Standing water weakens adhesives and seeps into seams.
- Scrubbing with abrasive brushes or pads – These can scratch the protective layer.
- Applying waxes or polishes not designed for vinyl – They can cause residue buildup.
Gentle care ensures long-lasting shine.
How to Make Your Vinyl Kitchen Floor Shine
Want your floor to gleam like new? After cleaning, buff it dry with a microfiber cloth. For extra sparkle, mix a few drops of baby oil into your cleaning solution. This gives a subtle sheen without making the floor slippery. Avoid oil-based products that can attract dirt over time. Consistency in maintenance is the real secret to brilliance.
Natural and DIY Solutions to Clean Kitchen Floor Vinyl
You prefer green cleaning, vinyl is compatible with many natural alternatives:
- Vinegar & Water Mix – Cuts through grime with no harsh residue.
- Baking Soda Paste – Gently removes scuffs and minor stains.
- Lemon Juice – Adds a fresh scent while lifting grease.
Always rinse with clean water afterward to avoid buildup.
How to Clean Grease and Oil Spills on Vinyl Kitchen Floors
Grease is a kitchen villain. Tackle it with dish soap and warm water—just a few drops on a sponge can cut through oily messes. For older, dried spots, apply a bit of baking soda and let it sit before wiping gently. Rinse thoroughly to avoid slick residue, and dry the area to maintain traction.
Cleaning Tips for Gardeners: Keeping Outdoor Dirt Off Your Vinyl
Gardeners often track in soil, mulch, and plant debris. Place doormats at all entrances, and opt for removable shoe covers if you’re transitioning from garden to kitchen frequently. Keep a small broom or handheld vacuum by the door for quick cleanups. Vinyl floors are forgiving, but grit from outdoors can scratch them over time.
Pet-Friendly Ways to Clean Kitchen Floor Vinyl
Pets can bring in dirt, dander, and the occasional accident. Use enzymatic cleaners for pet messes to neutralize odor without damaging the floor. Avoid ammonia—it smells like urine to many animals and might encourage repeat offenses. Keep pet paws clean and trimmed to reduce scratching and tracking.
After-Gardening Cleanup: Protecting Your Vinyl from Soil and Mud
After a day in the garden, remove shoes before entering and clean your tools outside. For mud tracked in, let it dry completely before sweeping—wet mud can smear and spread. Then, mop the area with a gentle cleaning solution. Prevent future mess by designating an entry mat or mudroom area.
Preventive Habits to Keep Your Vinyl Kitchen Floor Cleaner Longer
Small habits yield big results. Here’s how to protect your floors:
- Use rugs or mats near sinks and doors
- Sweep daily to prevent abrasive particles from settling
- Place felt pads under furniture legs
- Clean up spills immediately to prevent staining
- Keep pets groomed and nails trimmed
These mindful actions significantly reduce wear and tear.
When to Hire a Professional to Clean Kitchen Floor Vinyl
Despite your best efforts, sometimes grime wins. If your floor looks dull, discolored, or stained beyond DIY repair, it might be time to call in the pros. Professional cleaners use specialized tools and non-damaging solvents that can rejuvenate your vinyl without voiding warranties. It’s a worthy investment every once in a while.
Final Thoughts
Mastering how to clean kitchen floor vinyl is a blend of daily mindfulness and occasional deep care. With the right tools, natural solutions, and smart habits, your vinyl kitchen floor can remain a gleaming, low-maintenance showstopper. Treat it kindly, and it will return the favor with long-lasting beauty and resilience.