
Cooking can be an enjoyable experience, But cleaning up A burnt pot can be frustrating And time-consuming. Whether it’s due to leaving the pot on the stove for too long or forgetting to add water, burnt pots are a common kitchen mishap. Fortunately, there are several ways to clean burnt pots without causing any damage or spending hours scrubbing. In this article, We will explore various methods for cleaning burned pots And pans, Using simple ingredients that you probably already have in your kitchen. From baking soda to vinegar and other natural cleaners, you’ll learn how to restore your favorite cookware to its original shine without any hassle. So let’s get started with our guide on how to clean burned pots!
How Do You Clean A Badly Burnt Saucepan?
Cleaning A badly burnt saucepan can be challenging, but it’s not impossible. Here’s A simple method to tackle the problem. Start by filling the pan with water And adding A generous amount of dish soap. Bring the mixture to A boil And let It simmer for about 15 minutes. This will help loosen the burnt residue. Then, remove the pan from the heat And let It cool down. Next, use a scouring pad or a non-abrasive scrub brush to scrub away the burnt stains. For stubborn areas, create a paste using baking soda and water, and gently scrub with it. Rinse thoroughly, and repeat the process if necessary. With patience and persistence, your saucepan can be restored to its former glory.
How To Clean A Burnt Stainless Steel or Aluminum Pan?
Cleaning A burnt stainless steel or aluminum pan requires A different approach. Start by filling the pan with water And Adding A few tablespoons of white vinegar. Bring the mixture to A boil and let It simmer for about 10 minutes. This will help loosen the burnt residue. Then, Remove the pan from the heat And let It cool down. Next, Scrub the pan using A non-abrasive scrub brush or sponge with A mixture of baking soda And water. Rinse thoroughly and repeat the process if needed. Avoid using abrasive materials that can scratch the surface of stainless steel or aluminum pans.
Why Do Burnt Foods Stick To The Pan?
When foods get burnt And stick to the pan, It is primarily due to the chemical reaction known as the Maillard reaction. This reaction occurs when proteins and sugars in the food undergo a complex series of chemical changes during high-heat cooking. The resulting compounds are sticky and can adhere to the pan’s surface. Additionally, the carbonized remnants of burnt food can create a rough texture, Making It more prone to sticking. Proper temperature control, using non-stick pans, or adding enough oil can help prevent food from sticking and burning.
Prepare The Pot For Cleaning

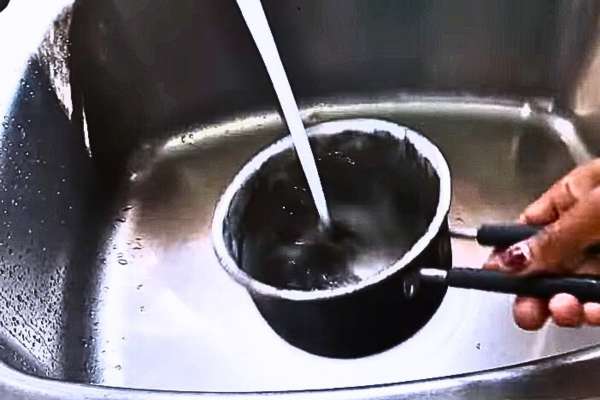
Cleaning A burned pot can be A daunting task, But with the right preparation And tools, It can be easy to remove any stubborn stains or burnt food. The first step in clean your burned pots is to let It cool down completely before handling It. Trying to clean A hot pot can result in injuries and also make the cleaning process more difficult.
Once cooled down, You should fill the pot with warm water And add some dish soap. Let it soak for at least 30 minutes to loosen up any burnt-on food or stains. After soaking, Use A non-abrasive sponge or brush to scrub away any remaining debris. Be sure not to use any harsh chemicals that could damage the surface of your pot.
Allowing The Pot To Cool Down

Dealing with burned pots can be A frustrating task, But There’s A simple step that often gets overlooked: allowing the pot to cool down. When we rush to clean A hot, burned pot, we risk damaging the surface And making the cleaning process even more challenging. By exercising a bit of patience and allowing the pot to cool naturally, we give ourselves a better chance at restoring it to its former glory. So, The next time you find yourself facing A burned pot, Take A deep breath, let it cool down, and prepare for a more successful cleaning endeavor.
Removing Loose Debris

In clean burned pots, One of the first steps to tackle is removing any loose debris. Before diving into scrubbing or using any cleaning agents, take a moment to assess the situation. Gently scrape off any large chunks or burnt food remnants using a wooden or plastic spatula. Be cautious not to scratch the surface of the pot, Especially if It has A non-stick coating. By eliminating Loose debris beforehand, you’ll make the subsequent cleaning process much more effective and efficient. This simple yet crucial step sets the foundation for A successful restoration of your once-burned pot.
Soak The Pot

One of the most effective methods to clean burned pots is to give them a good soak. After removing loose debris, fill the pot with warm water and add a few drops of dish soap. Let the pot sit and soak for A significant amount of time, preferably overnight. This soaking process works wonders in loosening stubborn food residues and softening the burnt layers. As the water penetrates into the burnt areas, it becomes easier to scrub and remove the remaining residue. So don’t rush the cleaning process; Instead, Let the pot soak And allow the water And soap to do their magic.
Use A Non-Abrasive Sponge Or Cloth

Opt for A non-abrasive sponge or cloth to avoid damaging the pot’s surface. Abrasive materials like steel wool or harsh scrub brushes can scratch and mar the pot’s finish, making it more prone to future sticking. Instead, go for A soft sponge or cloth that will provide gentle yet effective scrubbing action. Combine it with warm, soapy water or A mild cleaning solution to break down the remaining burnt residue. With the right tools in hand, you can restore your burned pot to its original shine without causing any harm.
Clean With ARM & HAMMER Baking Soda

This versatile household ingredient has long been known for Its cleaning prowess. To use baking soda to clean burned pots, sprinkle A generous amount over the affected areas. Then, Add A small amount of water to form A paste. Allow the paste to sit on the pot for A while, Preferably overnight, To allow the baking soda to work Its magic. The natural abrasive properties of baking soda, Combined with its ability to neutralize odors, will help break down the burnt residues and leave your pot looking and smelling fresh. Afterward, Rinse the pot thoroughly with water and enjoy its renewed cleanliness. ARM & HAMMER Baking Soda is an affordable, eco-friendly solution that can make A noticeable difference in reviving even the toughest burned pots.
Creating A Paste Using Baking Soda And Water

This powerful combination works wonders in removing stubborn stains and residue. To make the paste, Start by sprinkling A generous amount of baking soda onto the burnt areas of the pot. Then, Add A small amount of water to the baking soda And mix It until A thick paste forms. Apply this paste to the burned spots, Ensuring they are fully covered. Let the paste sit on the pot for A while to allow the baking soda’s natural properties to break down the burnt-on food. Afterward, use A non-abrasive sponge or cloth to gently scrub the pot, focusing on the areas with the paste. The mild abrasive nature of baking soda combined with its cleaning properties will help lift off the burnt residue without damaging the pot’s surface. Finally, rinse the pot thoroughly with water to remove any remaining paste, and enjoy your beautifully cleaned silver pot.
Scrubbing With A Non-Scratch Scrub Brush

One essential tool that every kitchen should have is A non-scratch scrub brush. These brushes are specifically designed to effectively remove stubborn residue without damaging the surface of your pots And pans. To clean A burned pots, Simply wet the brush and apply A small amount of dish soap to the bristles. Then, With gentle but firm pressure, Scrub the burned areas in circular motions. The non-scratch bristles will help lift off the burnt residue without scratching or harming the pot’s surface. Rinse the pot thoroughly with warm water, and you’ll be amazed at how easily the burnt remnants vanish. With a non-scratch scrub brush in your cleaning arsenal, you can say goodbye to the frustration of burned pots and restore them to their pristine condition with ease.
Adding Vinegar Or Lemon Juice To The Pot

If you’ve ever dealt with stubborn burned-on food in your pots And pans, You know how frustrating It can be to remove those stubborn stains. Thankfully, There’s A simple and natural solution that can help you tackle this problem effectively: Vinegar or lemon juice. These kitchen staples are not only great for adding flavor to your meals but also work wonders when It comes to cleaning. By adding vinegar or lemon juice to A pot filled with water and simmering it for A while, You can loosen the burnt food particles and make scrubbing A breeze. So, next time you’re faced with A burnt pot, reach for the vinegar or lemon juice And let the natural cleaning power work its magic.
Bringing The Mixture To A Boil

Dealing with burned pots can be A real headache, But fear not! There’s A simple technique that can make the cleaning process much easier: bringing the mixture to a boil. If you have A pot with stubborn burned-on residue, fill it with water and add a generous amount of dish soap. Place the pot on the stove And bring the mixture to A rolling boil. The heat and the soapy water will work together to break down the burnt food particles, making them easier to scrub away. Remember to use A non-abrasive sponge or brush to avoid damaging the pot’s surface. With this method, You’ll be able to restore your pots to their former glory in no time.
Letting It Simmer For A Few Minutes

One effective method to loosen burnt-on food is to fill the pot with water And let It simmer for A few minutes. The gentle heat and moisture will help soften the stubborn residue, making it easier to remove. Remember not to let the water evaporate completely and keep an eye on the pot to avoid any accidents. After simmering, You can use A gentle scrub brush or sponge to easily clean away the burnt remnants. This simple yet effective technique will save you time and effort, Leaving your pots looking pristine once again.
Scrubbing Away The Loosened Stains

Armed with a non-abrasive sponge or scrub brush, gently work the surface of the pot in circular motions, focusing on the areas with the most stubborn residue. The combination of the previously applied techniques and your scrubbing efforts should make the task relatively easy. Rinse the pot thoroughly with warm water to remove any remaining debris, And voila! Your pot will be clean, Shiny, And ready for its next culinary adventure. Remember, A little elbow grease goes A long way in achieving spotless cookware.
Rinse And Dry
After successfully scrubbing away the loosened stains from your burned pot, The final step is to give It A thorough rinse and dry it. Rinse the pot under warm water to remove any remaining soap residue or debris. Ensure that all the cleaning agents are thoroughly washed away. Once rinsed, Use A clean towel or dishcloth to dry the pot completely. This step is essential to prevent water spots or mineral deposits from forming on the surface of the pot. Once dry, Your pot is now clean, Fresh, And ready to be used again for your culinary creations.
The Final Thought
Clean burned pots can be A frustrating task, But with the right techniques, It becomes much more manageable. Whether you choose to add vinegar or lemon juice, bring the mixture to A boil, let It simmer, Or scrub away the loosened stains, The key is to be patient and persistent. By following these steps and giving your pots some tender loving care, you can restore them to their former glory. Remember to rinse and dry them thoroughly to avoid any water spots or residue. With these simple yet effective methods, you can say goodbye to stubborn burnt-on food and hello to sparkling clean pots that are ready for your next culinary adventure.