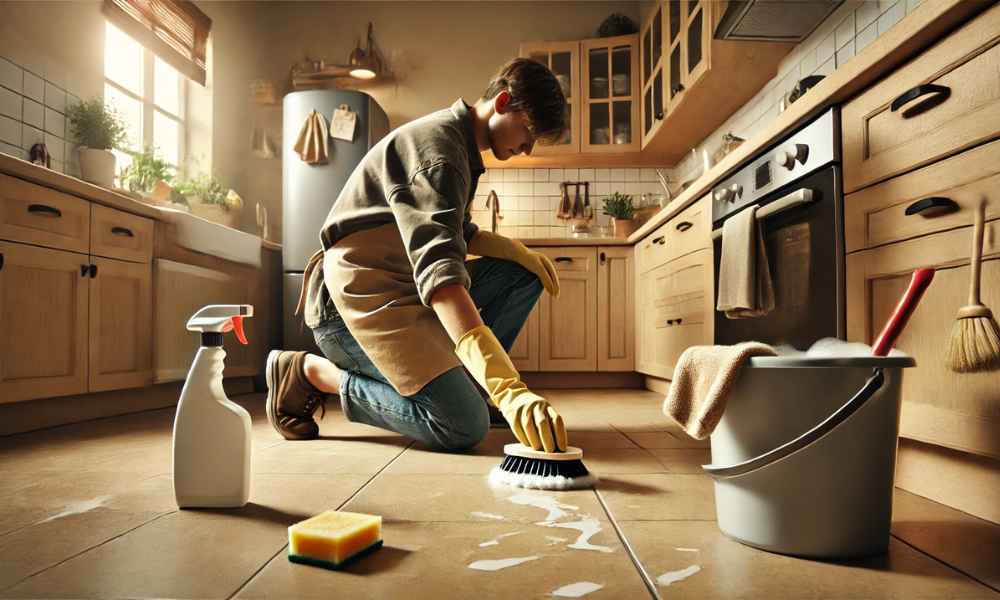
There’s something remarkably satisfying about scrubbing your kitchen floor with your own two hands. Unlike automated mops or robot cleaners, hand-cleaning delivers precision, allowing you to tackle every corner, crevice, and spill with surgical accuracy. It’s therapeutic, too—there’s a meditative rhythm to the swish of the cloth, the gleam that slowly emerges, the silent pride of a job well done. In a space where hygiene is paramount, cleaning by hand ensures you’re not just pushing dirt around but truly removing it. It’s not just cleaning—it’s reclaiming your sanctuary.
Understanding Your Kitchen Floor Type Before You Start
Not all kitchen floors are created equal. Before diving in, it’s vital to identify your flooring type—ceramic tile, vinyl, laminate, natural stone, or hardwood—because each surface demands a different cleaning approach. Porous stone like travertine loathes acidic cleaners, while hardwood wilts under excessive moisture. Vinyl may tolerate more elbow grease, whereas laminate floors are sensitive to water penetration. Knowing what you’re dealing with isn’t optional—it’s foundational. Misidentifying your floor type could result in irreversible damage or a dulled finish.
Supplies You’ll Need to Clean Kitchen Floor by Hand
Equipping yourself properly can make the task feel less like a chore and more like an efficient mission. At the very least, gather:
- A bucket filled with warm water
- A microfiber cloth or soft scrub brush
- A non-abrasive sponge
- pH-neutral cleaner or floor-specific solution
- Old towels or absorbent rags
- Kneepads or a cushion (your joints will thank you)
Optional but helpful additions include a toothbrush for grout, essential oils for scent, and gloves to protect your skin.
Preparation: Set the Stage for a Successful Clean
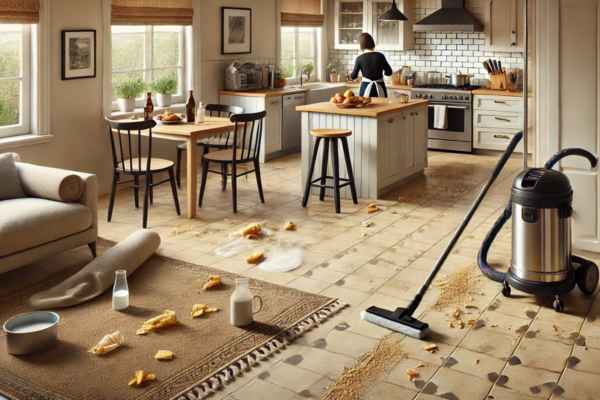
Preparation is half the battle. Begin by removing all rugs, chairs, and movable furniture. Sweep or vacuum thoroughly to eliminate surface debris—grains of rice, broken chips, and the ever-lurking onion peel can scratch surfaces when wet. Pre-treat stubborn stains with a dab of cleaner and let it sit. If your floor has grout lines, dampen them lightly beforehand to loosen embedded dirt. Open windows or turn on fans to promote ventilation—fresh air keeps cleaning more pleasant and speeds up drying later.
Start With the Corners: Don’t Miss the Edges

Corners are often the dirtiest real estate in your kitchen—where crumbs accumulate and sticky splatters hide. Start there. Use a damp cloth wrapped around your fingers or a small detailing brush to reach into the nooks. Work methodically from the outer edges toward the center. This technique ensures you don’t push debris into areas you’ve already cleaned and gives the whole room a cleaner, more polished appearance.
The Right Way to Scrub: Gentle But Effective Techniques

Vigorous scrubbing might feel productive, but brute force can damage delicate surfaces. Instead, aim for firm but gentle pressure using circular motions. Let your cleaner do the heavy lifting—allow it to dwell for a minute before wiping. On slick vinyl, a microfiber cloth with a bit of friction works wonders. For tougher messes, use a soft-bristled brush. Work in small sections, rinsing your cloth regularly to avoid redistributing grime.
DIY Cleaning Solutions for Every Floor Type
Skip the chemical cocktail. Most floors respond beautifully to DIY mixes that are effective and earth-friendly. Here are some safe, homemade options:
- Tile or vinyl: Mix warm water with a few drops of dish soap and white vinegar.
- Hardwood: Use distilled water with a splash of castile soap—avoid excess moisture.
- Laminate: A lightly damp microfiber cloth with a vinegar-water mix (1:3 ratio).
- Stone floors: Avoid anything acidic. Opt for warm water with a gentle pH-neutral soap.
Add a few drops of lavender or lemon essential oil for a clean, uplifting scent that lingers.
Tackling Grease and Sticky Spots Without Harsh Chemicals
Grease is a relentless kitchen villain. Fortunately, you don’t need industrial-strength solvents to win. Sprinkle baking soda directly onto the greasy spot, spray with warm vinegar solution, and let it fizz. Then wipe gently. Sticky syrup? Apply a dab of coconut oil or olive oil, let it sit, then scrub with a soft cloth. Follow up with a clean water rinse. This gentle method preserves your floor while eradicating buildup.
Dealing With Grout Lines and Tiny Cracks
Grout and micro-cracks are dirt magnets. Use an old toothbrush dipped in a paste of baking soda and water. Gently scrub in a back-and-forth motion. For stubborn grime, follow with a splash of hydrogen peroxide—its bubbling action lifts years of grime. Rinse thoroughly and dry with a towel. Sealing your grout once a year can prevent future buildup and make cleaning easier over time.
Drying the Floor Like a Pro
Leaving your floor wet invites slips and sticky residues. After cleaning, use clean, dry towels to blot the surface. Dragging a large towel with your foot can cover wider areas quickly. For hardwood or laminate, drying is crucial—excess moisture warps planks and dulls finishes. If you’re in a rush, place a fan nearby or open windows to expedite airflow.
How to Clean Kitchen Floor by Hand Without Hurting Your Back
Manual cleaning shouldn’t be synonymous with backache. Kneel on a padded cushion or wear kneepads. Work in short bursts, taking breaks every 10–15 minutes to stretch your spine. Use tools with ergonomic handles if possible. Alternate hands to avoid muscle fatigue. Above all, keep your back straight while working and avoid twisting your torso—pivot your entire body when reaching new sections.
Make It a Routine: How Often Should You Hand Clean Your Kitchen Floor?
Frequency depends on your household traffic. For a family kitchen, once a week is ideal. If you cook daily or have pets, twice weekly may be necessary. Spot clean spills immediately to prevent them from hardening or staining. A monthly deep hand-clean ensures nothing escapes your attention. Set a reminder—it’s easier to maintain than to restore.
Mistakes to Avoid When Cleaning Your Kitchen Floor by Hand
Even with the best intentions, errors happen. Avoid these common missteps:
- Using too much water, especially on wood or laminate
- Applying harsh chemicals that strip protective coatings
- Ignoring corners and under appliances
- Using abrasive brushes or pads that scratch surfaces
- Skipping the rinse step—leftover residue attracts more dirt
Intentional cleaning yields better results than mindless scrubbing.
How to Keep Your Kitchen Floor Clean Longer
Prevention is your best cleaning ally. Place rugs at entrances to trap dirt. Use felt pads under furniture to reduce scuffing. Clean up spills immediately, even if they seem minor. Encourage a shoes-off policy indoors. Sweep or vacuum every other day to remove crumbs before they become floor glue. These small habits collectively make hand-cleaning less laborious.
Bonus: Involving the Family in Kitchen Floor Cleaning
Make it a communal chore—not a solitary punishment. Assign age-appropriate tasks: kids can spot-sweep, teens can help scrub, and partners can handle prep or drying. Turn up some music. Set a timer. Make it a race. When everyone contributes, the task becomes faster—and a lot more fun. Plus, you’re instilling a valuable sense of ownership in your shared space.
Conclusion
There’s undeniable satisfaction in restoring the luster of your kitchen floor by hand. It’s intimate, thorough, and far more rewarding than relying on machines. By understanding your floor type, using the right tools, and mastering the rhythm of scrubbing, you ensure cleanliness that’s both deep and lasting. With each sweep of the cloth, you’re not just removing dirt—you’re infusing care into the heart of your home.