
Cleaning kitchen ground tile grout is an essential undertaking for maintaining the cleanliness and look of your kitchen. Grout is the regularly-ignored fabric that holds your tiles together, however over time, it can gather dirt, stains, and dirt, making it appearance stupid and unsightly. Regular grout cleansing not simplest improves the general look of your ground however also allows to increase the existence of your tiles. If you are wondering how to clean kitchen floor tile grout successfully, this manual will walk you through the steps in a simple and easy-to-follow manner, making sure that your grout strains stay sparkling and spotless.
What Is Grout and Why Does It Get Dirty?
Grout is a thick paste used to fill the gaps between tiles, imparting balance and a completed look on your flooring and partitions. While grout is normally fabricated from cement, sand, and water, it may take in moisture and dust out of your kitchen surroundings. This makes it liable to stains, specifically in high-visitors areas like the kitchen. Oils, food debris, and spills can seep into the porous surface of grout, main to discoloration and dust build-up. In addition, the humidity and steam from cooking and washing dishes can boost up the manner, making it even greater essential to clean your grout regularly. Understanding how grout receives grimy will assist you’re taking proactive steps to keep it looking clean and bright.
Preparing for Grout Cleaning: Tools and Materials You’ll Need
Before you dive into cleaning your kitchen floor tile grout, it’s crucial to gather the proper equipment and substances. A successful grout cleaning task requires a few vital items with a purpose to make the manner more green and powerful. First, you’ll want an excellent excellent grout cleaner. While there are many industrial cleaners available, you may also make your own the use of easy family ingredients like baking soda, vinegar, or hydrogen peroxide. In addition to a cleanser, having a grout brush or an vintage toothbrush will help you scrub away stubborn dust without unfavorable the grout. You’ll additionally want a mop or a smooth cloth to rinse and dry the floor after cleaning. Lastly, don’t overlook gloves to protect your hands, as some cleansing solutions can be harsh on the skin. With those equipment in hand, you’re prepared to address your grout cleaning project with self belief!
Step 1: Sweeping and Vacuuming Your Kitchen Floor

Before you begin cleansing your kitchen floor tile grout, it’s essential to prepare the surface. Begin by means of sweeping the ground thoroughly to eliminate any free dirt, crumbs, and particles. Use a brush or a microfiber material to make sure you don’t miss any particles that would intervene with the cleaning procedure. For a fair more effective approach, consider vacuuming the ground with a nozzle attachment to seize the smallest dust debris which can get stuck in the grout strains. A smooth floor is prime to achieving a successful grout cleaning result, so make certain you get rid of any dust and debris before shifting on to the following step.
Step 2: Choosing the Best Cleaning Solution for Your Tile Grout

Selecting the proper cleaning answer is vital when cleansing tile grout, as distinctive types of grout may additionally require exclusive approaches. You should purchase a commercial grout cleaner or make your very own answer the use of commonplace household components. A famous DIY choice is mixing baking soda and vinegar, which collectively create a effective herbal cleaner which can elevate stains and dirt from the grout strains. If you decide on a chemical answer, look for products mainly designed for grout cleaning, ensuring they may be secure to be used to your tiles. Always check the product labels for compatibility with your tile material, and keep away from harsh chemical substances which could damage the grout or tiles.
Step 3: How to Apply the Cleaning Solution to the Grout

Once you’ve chosen the first-rate cleaning solution, it’s time to use it to the grout. If you’re the use of a store-bought grout purifier, follow the manufacturer’s instructions for utility. For a DIY answer, clearly practice the baking soda paste or vinegar mixture immediately onto the grout lines. Be beneficiant with the utility, ensuring that the grout is properly-coated. Use a small brush or sponge to gently work the answer into the grout, masking each inch. Let the cleansing answer take a seat for five to 10 mins, permitting it to interrupt down the dirt and stains trapped in the grout.
Step 4: Scrubbing the Grout Lines

Now comes the scrubbing element – the most essential step in removing dirt and stains from grout lines. Use a grout brush or an old toothbrush to clean the grout lightly but firmly. Focus on one small phase at a time, applying a chunk of strain to lift the dirt. Make sure to work in circular motions to successfully scrub the grout with out unfavorable the surface. For particularly stubborn stains, you can want to repeat the scrubbing method, reapplying the cleaning solution as wanted. With patience and elbow grease, you’ll be able to restore the grout’s original look.
Step 5: Rinsing and Wiping the Floor

After you’ve scrubbed the grout, it’s time to rinse off the cleaning solution and wipe down the floor. Fill a bucket with warm water and use a mop or sponge to wipe away the extra cleaner. It’s essential to eliminate all residue to save you it from hardening and leaving streaks at the tile. Continue rinsing and wiping the ground in sections till you’ve removed all of the cleanser from the grout traces and tile floor. Once the ground is smooth, dry it with a smooth fabric to make certain that no water or cleaning answer is left behind, as this can depart streaks or a sticky residue.
Step 6: Dealing with Stubborn Grout Stains
Sometimes, grout stains can be specially cussed and require a touch greater interest. For hard stains, strive using a paste crafted from baking soda and hydrogen peroxide. Apply it to the stained grout and let it sit down for 10-15 minutes earlier than scrubbing once more. For actually deep-set stains, you could want to use a steam cleanser or a excessive-pressure water device to loosen the dust. Always take a look at any new cleansing approach in a small, inconspicuous area first to make sure it won’t harm your grout or tiles. If stains persist regardless of your efforts, don’t forget consulting a expert grout cleaner for a more intense treatment.
Step 7: Sealing Your Grout for Long-Term Protection

To hold your grout searching clean and clean for longer, it’s vital to seal it once it’s thoroughly wiped clean. Grout sealer forms a shielding barrier at the surface of the grout, supporting to save you dirt, moisture, and stains from penetrating. This simple step could make all of the difference in retaining the cleanliness of your grout in the destiny. After the grout is absolutely dry, apply a high-quality grout sealer the usage of a small applicator or brush. Follow the producer’s instructions for application and allow the sealer to dry absolutely earlier than the usage of the ground again. Regular sealing can assist keep your kitchen flooring searching pristine and reduce the frequency of grout cleansing in the destiny.
Preventing Future Grout Stains: Tips and Tricks
Once your grout is easy, it’s important to take steps to hold it looking fresh for so long as possible. One of the satisfactory ways to save you destiny grout stains is through sealing your grout after cleaning. A notable grout sealer creates a protecting barrier, making it harder for dirt, food, and moisture to seep into the grout lines. Additionally, attempt to easy up spills straight away, especially in the event that they involve oils or acidic beverages like vinegar or citrus juice, as these can cause stains over the years.
Regularly sweep or vacuum the floor to save you dirt from building up, and mop your floors with a mild cleansing way to keep away from harsh chemicals that might degrade the grout. By setting up a regular cleansing habitual and making those small modifications to your kitchen habits, you can notably lessen the quantity of dust and stains that increase to your grout traces.
Common Mistakes to Avoid While Cleaning Grout
Cleaning grout, there are numerous common errors that can make the mission greater tough or maybe reason harm on your tiles. One mistake is the use of harsh, abrasive scrubbing gear that can scratch or damage the grout and tiles. Instead, continually use a gentle-bristled brush or an vintage toothbrush to wash the grout lightly. Another mistake is making use of an excessive amount of cleaning solution and not rinsing it off thoroughly, that may depart residue that attracts extra dirt. Make sure to wipe down the ground very well after cleansing to avoid this issue. Also, be careful when the use of commercial cleaners — a few incorporate harsh chemicals that could erode the grout over the years, so choose a pH-balanced purifier each time possible. Lastly, don’t forget about the importance of drying your grout after cleaning; leaving excess moisture can promote mildew and mould grow
Alternative Methods for Cleaning Grout: What Works Best?
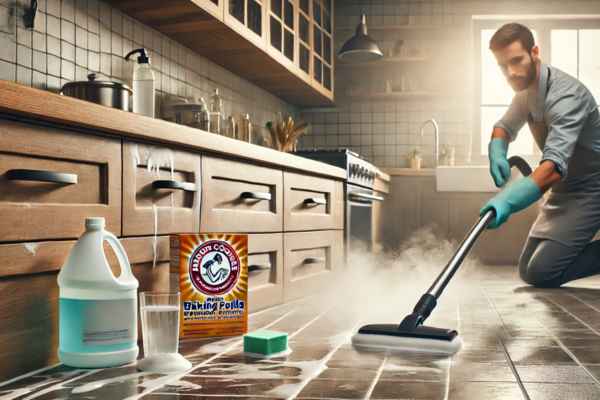
While conventional scrubbing with a cleansing answer is regularly powerful, there are several alternative methods that may paintings wonders for grout cleansing. Steam cleansing is one such approach that makes use of high-pressure steam to break down dust and dirt within the grout lines. It’s a herbal and chemical-loose choice that’s best for those who pick green solutions. Another option is using a high-stress water device, that can efficiently blast away debris from deep in the grout lines with out damaging the tiles. For a less aggressive approach, a commercial grout purifier with a unique formula designed to break down stains may be noticeably effective, however ensure it’s secure in your specific tile type. If you have got get right of entry to to a strength scrubber or an oscillating device with a grout brush attachment, this may additionally speed up the cleansing manner, specially for big areas of grout.
Conclusion
Cleaning kitchen ground tile grout doesn’t need to be a frightening mission. By following the right steps, the use of the right equipment, and taking preventative measures, you could preserve your grout looking fresh and vivid for a long time. Regular cleansing and sealing are key to preserving a smooth kitchen floor, even as heading off commonplace errors and the usage of alternative strategies can make the activity even less difficult. With the proper method and a little elbow grease, your grout will live free from stains, assisting your kitchen floor maintain its beauty and shine for years yet to come.