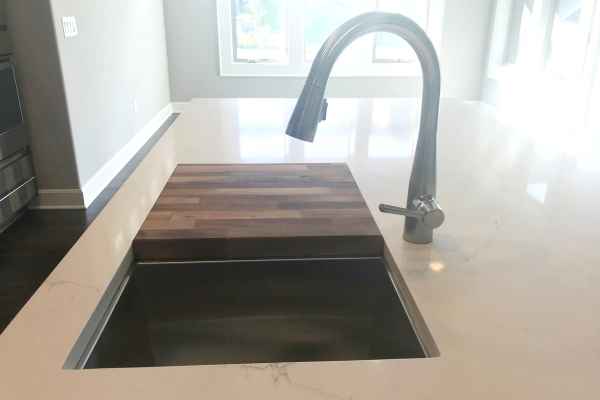
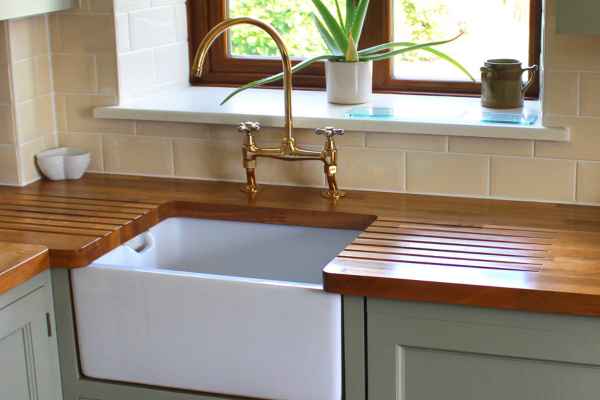
Butcher block counter tops—conventional, durable, and welcoming—have a completely unique appeal that seamlessly integrates warmth and practicality into any kitchen. Yet, in spite of their enchantment, the venture of reducing a sink hole on this strong fabric can evoke hesitation for many owners. The notion of negative one of these stunning surface might make one pause. But worry no longer. With precision, the proper set of tools, and a touch of endurance, this challenge will become practicable. Today, we will manual you step-via-step, ensuring your butcher blocks sink installation looks as seamless and expert as you envision. Cut Butcher Block Sink Hole.
Understanding the Importance of Butcher Block in Kitchens
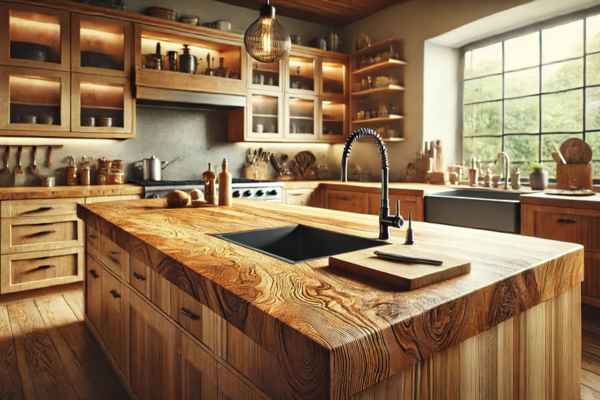
Butcher block stands apart in the realm of countertop materials. Its natural charm and textured grain give kitchens an organic, welcoming atmosphere that few different substances can replicate. Unlike artificial options, butcher is alive within the experience that it develops man or woman over the years, bearing marks and scratches that tell a story. Its warm temperature, both aesthetically and to the touch, is particularly appealing. But with splendor comes obligation. You want to recognize the grain, its moisture sensitivity, and the way wood responds to tools. Synthetic substances lack this personality, however butcher requires a sensitive balance of care and technique, mainly while slicing into it for a sink.
Getting Ready: Tools and Materials You’ll Need
Before embarking on the cutting process, preparation isn’t just important—it’s critical. Missing a tool or using the wrong one could result in a less-than-perfect finish, and with butcher blocks, every imperfection shows. Gather the essentials:
- A jigsaw with a fine-tooth blade, ideally suited for the wood’s dense structure.
- A drill armed with spade or Forstner bits to create those all-important pilot holes.
- Precision instruments like measuring tape, a pencil, and a square to ensure your cuts align exactly where they need to.
- Sandpaper, preferably 120-grit, to smooth those edges after cutting.
- Clamps to anchor the butcher block securely, preventing any unwanted shifts during the cutting process.
- Safety gear—goggles and gloves—because your well-being is just as important as the task at hand.
Each of these tools serves a specific purpose, and when used correctly, they become the difference between a job well done and a headache waiting to happen.
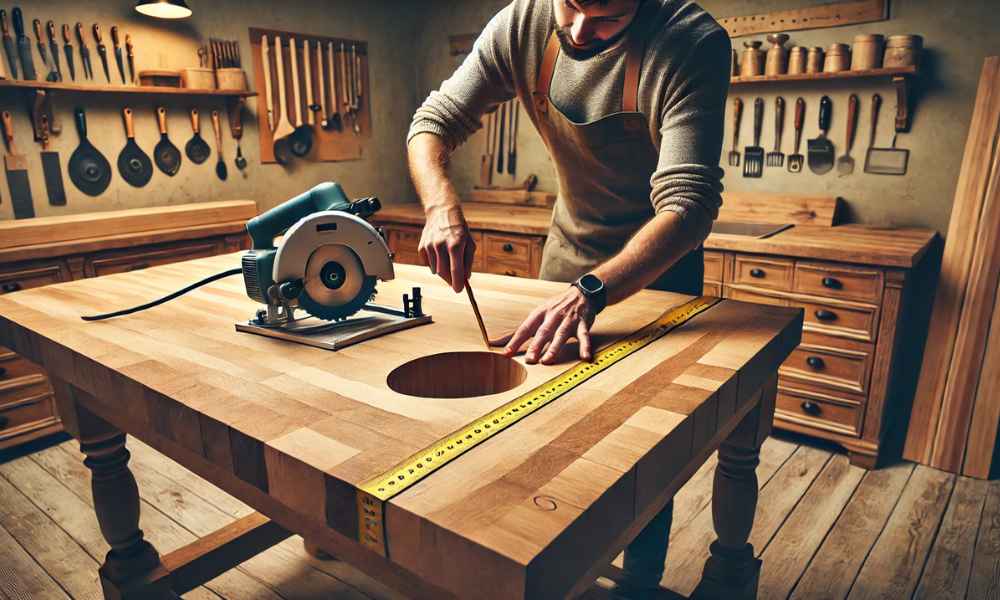
Measuring the Sink Area: Getting the Dimensions Right
In woodworking, precision is the call of the game, and nowhere is this greater real than while measuring for a sink hollow in a butcher blocks countertop. The sink’s dimensions—both outer edges and the lip that rests at the surface—need to be captured accurately. Using a pencil and square, mark the sink’s perimeter without delay onto the butcher. Don’t eyeball it. Precision here is critical. Measure, then measure once more. Double-checking guarantees there’s no room for error. Sink flanges require space, and one misstep should ruin the whole reduce, leading to costly do-overs. Accuracy here isn’t only a luxury—it’s a necessity.
Preparing the Butcher Block for Cutting
With your measurements set, the next section is instruction. Sand down the vicinity where the sink hole will be cut, making sure the floor is smooth and freed from imperfections that might intervene with the system. Secure the block tightly in your workbench or sawhorses the usage of clamps. The balance of the butcher at some point of the reducing system is paramount—any motion may want to result in choppy edges. Masking tape, implemented alongside the cutting traces, facilitates decrease chipping. These steps may also appear tedious, but thorough guidance will prevent limitless complications and make sure a smooth, expert result.
Choosing the Right Blade for Cutting
Choosing the proper blade may not look like a large deal, but agree with me—it’s far. The wrong blade can flip a smooth activity into a splintered mess. A fine-teeth blade, especially crafted for timber, will reduce through the butcher blocks with precision. Opt for adjustable-speed jigsaws, because the capability to govern the velocity of your cuts will help you adapt to the material’s density. Rushing is your enemy right here. Let the blade do the work, and cross gradual. In woodworking, slower regularly equals smoother, particularly with substances as dense as butcher.
Cutting the Pilot Holes: The First Step
Pilot holes are your gateway to a clean cut. These holes will permit you to insert your jigsaw blade into the timber and start the process. Drill a hollow at each nook of your marked define, ensuring they’re large enough to in shape the jigsaw blade. Accuracy in drilling these holes will dictate the float of your slicing technique. Be consistent, and drill straight down—any deviation should lead to uneven edges. These small cuts act as a roadmap for your jigsaw, guiding the blade as you work through the wood.
Cutting the Butcher Block Sink Hole

Now comes the moment of fact—slicing the sink hole itself. Carefully insert the jigsaw blade into certainly one of your pilot holes and start the cut along the marked line. The key right here is endurance. A hurried cut is a messy one. Guide the blade slowly, letting it follow the grain of the wooden, as this can minimize splintering. Maintain a steady hand and a sluggish tempo. Allow the jigsaw’s blade to float thru the wooden, and withstand the urge to rush the method. The end result may be a easy, even reduce that suits your sink like a glove.
Dealing with Common Challenges While Cutting
Cutting butcher block isn’t always with out its challenges. Splintering can arise, especially when running in opposition to the grain. To fight this, observe best mild pressure to the jigsaw, allowing the blade to do the paintings. If your blade becomes stuck, don’t panic. Turn off the jigsaw, lightly put off the blade, and re-examine earlier than persevering with. Tighten your clamps if the butcher actions throughout slicing. The secret is to stay calm and manage every undertaking with care. Every problem has a solution.
Sanding the Cut Edges for a Professional Finish
Once the sink hole is cut, the rims are in all likelihood to be tough. Sanding transforms this raw reduce right into a expert-searching finish. Using one hundred twenty-grit sandpaper, comply with the grain of the wood as you smooth out the cut edges. Not only does sanding beautify the look of the cut, but it also ensures a better seal when the sink is set up. A properly-sanded aspect speaks of precision and craftsmanship, making all of the difference in the very last end result.
Sealing and Protecting the Cut Edges
Wood is prone to moisture, and butcher blocks isn’t any exception. Sealing the freshly cut edges is essential to save you water harm. A water-proof wooden sealant, carried out flippantly along the rims, will protect the wooden from the inevitable water publicity across the sink. Allow the sealant to dry absolutely earlier than shifting directly to the following steps. Protecting the wood isn’t just about aesthetics—it’s approximately extending the existence of your countertop.
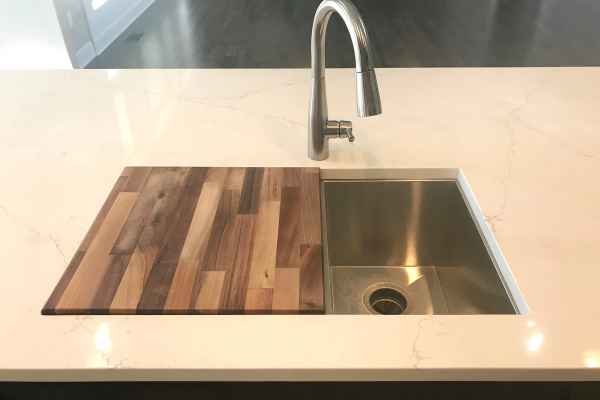
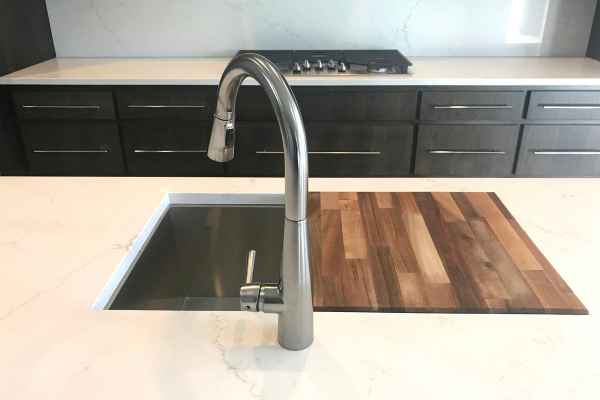
Installing the Sink: Final Steps
The hollow is cut, the edges are smooth, and now it’s time to put in the sink. Gently lower the sink into the newly cut hollow, checking for a comfortable match. Secure the sink in area the usage of the hardware supplied, and observe a bead of silicone sealant around the edges to create a watertight barrier. This step ensures that water doesn’t seep among the sink and the butcher block. Wipe away any excess sealant, leaving a smooth, polished end.
Caring for Your Butcher Block Countertop
The adventure doesn’t give up with set up. Caring in your butcher blocks countertop ensures its longevity. After set up, deal with the timber with mineral oil or a butcher conditioner. This maintains the timber’s herbal luster whilst defensive it from water and stains. Reapply regularly to hold the wood in top circumstance. Additionally, keep away from leaving water standing on the surface for long intervals, as this can cause warping or damage over the years.
Troubleshooting Issues After Installation
Even with the fine making plans, post-installation problems can arise. If gaps seem between the sink and countertop, additional sealant may be required. Warping or moisture harm across the sink suggests that the wooden might not have been properly sealed. Address these issues right away to prevent further damage. If tremendous troubles arise, inclusive of choppy cutting or large gaps, bear in mind consulting a expert to make sure the integrity of your countertop.
Can I Cut the Sink Hole Without Professional Help?
Cutting a butcher blocks sink hole is surely a undertaking that requires recognition and the proper gear. But for those with patience and a watch for detail, it’s actually practicable. However, if you find yourself uncertain or uncomfortable with the manner, in search of professional assistance can save time and make certain the task is performed flawlessly. After all, a flawless countertop is really worth the funding.
What’s the Best Way to Keep Butcher Block from Splintering?
To prevent splintering whilst slicing butcher blocks, constantly use a first-rate-enamel blade designed for wood. Apply regular pressure and go slow, allowing the blade to follow the timber’s grain. Masking tape along your cutting traces can in addition lessen the threat of splintering, and clamping the timber securely in location will save you any transferring. Lastly, sanding the edges put up-reduce ensures a clean end and decreases any minor splintering which can have occurred all through the slicing manner.
Conclusion
A butcher blocks countertop offers unmatched warmth and functionality, but installing a sink requires precision and care. While the process of cutting a butcher sink hole may seem intimidating at first, with the right tools, preparation, and attention to detail, it can be successfully completed by any determined DIY enthusiast. From selecting the correct blade to ensuring a smooth finish through sanding and sealing, each step is crucial to achieving a professional result. The satisfaction of a well-executed project not only adds beauty to your kitchen but also gives you the confidence to tackle future home improvements. Whether you choose to take on the task yourself or seek professional help, understanding the intricacies of cutting butcher blocks ensures a long-lasting, beautiful countertop that enhances your kitchen for years to come.